#at this point a good concealer would do. cream bronzer
Explore tagged Tumblr posts
Text
is there any good foundation/bb cream for dry/sensitive skin out there? I feel like like all the make up I've tried lately has been extremely boring :-(
5 notes
·
View notes
Text
Vogue morning routine
Y/N Y/N/L’s guide to effortless natural makeup
Summary: you are asked to do the Vogue Beauty Secrets video and your two boys decide to join the party
Word count: around 2000
Warning: none, just pure floof!
I apologize in advance if there are any spelling and/or grammar mistakes, English is not my first language (+ this is my very first fic)
HEADLINE Henry Cavill’s new girlfriend, designer Y/N Y/L/N reveals her everyday morning routine in recent Vogue video: Y/N Y/L/N shows off her secrets to the perfect fusion of European and Asian beauty.
You stood in the spacious bathroom of the hotel room, only wearing a big, fluffy, white robe, that was actually Henry’s. But since the man was in the gym, you took the opportunity to lend it and bathe yourself in his musky smell, that calmed your nerves. Last night you started panicking, thinking you would probably look stupid for the entire world to see, luckily Henry and Kal tried to calm you down with cuddles and kisses.
This was the first ‘interview’ you would do, being such a young, successful entrepreneur really caught the attention of the media. When you first started your small online shop, you never would have thought you would end up here. Five years later, with a steady income, the job you always wished for and the man you had a crush on since the first time you laid eyes on him. Being a creative, it really made your heart soar with happiness, seeing all your products, your babies, in new homes where they would make others happy.
You were really proud of yourself. Henry was as well, and he made sure you and everybody around you knew. You were apprehensive at first, being with such a well known actor, who was also much older than you, it made you nervous of what people would say, what the media would say. You didn’t want to tarnish Henry’s image. You knew there were people with a much bigger age gap, but still, people were ruthless. So you both decided to take it slow, being careful with going out in public and social media posts.
You stand in front of the large mirror, which had a camera attached to it and open up your makeup bag. Right before you went into the bathroom, you made yourself a nice cup of tea, trying to stay calm. “Hi! I’m Y/N and today I am going to show you my everyday makeup routine,” you say with a smile, “I am not a dermatologist so please don’t take what I say too seriously.”
You grab a small white washcloth and hold it up, so it was in the frame, “First, I am going to wash my face and put on a few drops of serum,” You dampen the cloth and wipe it over your face and neck. You put a few drops in the palm of your hand and pat them into your skin. “Now I going to use my jade roller to massage the serum into my skin. It’s quite funny seeing so many people use these nowadays. In ancient China they were mostly used by the elite to keep there skin ageless. They would call jade the Stone of Heaven. It’s really helpful for the people who wake up with a puffy face like me,” you chuckle.
Somethimes you’d wake up with puffy cheeks, which led to Henry calling you his chubby bunny in the morning.
“Just a quick tip, and this is for everybody, make sure you always use SPF. I personally use SPF 30 and this one is shine control, since I tend to get an oily skin, but you can also use a regular one or a foundation with SPF in it. Believe me when I say your skin will be thankful.”
You grab the small tube of sun cream and show the amount you’ll use. You even convinced Henry to wear SPF everyday. At first he said he didn’t think it would make such a big difference, but when he realised you were going to be the one to put it on him, he was convinced about its benefits and adamant to wear it everyday. After working the thick cream into your skin, you put on some lipbalm and rummage through the pouch in front of you. When you find the product you’re looking for, you hold it up. “Now, I am going to put on a bit of concealer, this one is from Maybelline. After this, I will use a lighter shade under my eyes and on my acne scars that I have here,” you point and circle around the small cluster of scars on the sides of your cheeks.
Before blending out the concealer, you smile at the lens and put in two bright yellow hairclips, to keep your dark locks from falling into your face. “I probably should have done this at the start,” you laugh. The nerves creeping up a little. It wasn’t that you where a shy person, but knowing thousands of people will watch this, did something to you. You were always a very easygoing person, who could talk with pretty much everybody. But knowing people were going to watch you do something so intimate in a way, and would probably comment on it, scared you a little. While you would be 100% yourself, doing something as mundane as getting ready. If they didn’t like you now, then they probably won’t like you later. And that was what made you so afraid.
The bathrobe falls a bit down your shoulder, but you ignore it, since your hair fell down your shoulders in big waves. “Okay, brows. I used to block them in really dark when I was younger, but now I try to keep a light hand. I’ll use this Got 2B Glued as a brow gel afterwards. The tails of my eyebrows tend to move if I don’t use a strong enough gel. If you’re Asian you will understand the struggle.”
You quickly finish your brows, put some bronzer on your face and eyelids and take out your liquid eyeliner. “Am I the only one that acts like I’m a beauty guru whenever I do my makeup? Like, I’m just acting as if I’m used to this, right now, but to be honest, I was really nervous to do this video for Vogue,” you admit, “they will probably regret asking me,” you chuckle. You finish your eyemakeup with curling your long lashes, thanks to your mother’s genes, and add a coat of mascara.
You take in a deep breath, excited to show everyone the product you had been waiting for. “The next thing I am really proud to show you guys, because I designed the packaging. This is the new limited edition blush and highlighter palette from Dior, which they created for Lunar New Year!” You beam with pride, holding up the elegant looking palette. It had a darker toned glossy finish and the borders were the traditional Chinese looking frames, which were 3D and were surrounded by a wild variety of peonies. In the middle of the lid was your Chinese calligraphy in big golden brush stokes that said ‘year of the Ox’, the clasp was designed so it resembled an antique Chinese coin and on the side hung a jade charm.
“You can pre-order this palette now, I think they will put a link-thingy in de description. I wish you all a happy and blessed Lunar New Year, 祝农历年新年快乐牛年大吉!”
Just as you’re about to add some blush to your cheeks, the bathroom door creaks open and a curly-headed, sweaty Henry pops his head in. Fresh from the gym, and were you thankful for his new intense workout, because he was truely a sight to behold. A cheeky smile graces his handsome face when he spots you in front of the mirror, only wearing his robe, which made his grin widen.
“what are you doing in here? Are you hiding from me? Playing hide and seek is it?” he teases and rakes his large hand through the tousled curls, but just as he’s done speaking, he sees the camera behind you, and blushes. “Oh, I didn’t know you were filming, I’m sorry darling,” he smiles and gives a small wave in the direction of the camera. You led out a giggle, cheeks turning red already, if he’d keep this up, you wouldn’t need to add blush. You couldn’t focus anymore, he looked so attractive, only wearing his black gym shorts and a tight dark blue tank top. Damn that camera, otherwise you would have jumped him. Henry, thought the exact same thing. Seeing you, only wearing his robe and your hair still a bit wild from this morning’s cardio, made him hold back a moan. Those two cute, yellow clips in your hair could have fooled him, because you were anything but innocent.
Before he’s about to close the door again, he blows you a kiss. But his actions are stopped when a big bear makes his appearance. Bolting past his dad’s legs, Kal comes into the bathroom. Henry tries to catch him but misses. The black and white akita excitedly sniffs his head around the sink, trying to see what you were up to with all the stuff lying on the marble counter.
“Kal!” Henry whisper-yelled, trying to stay hidden behind the door. But you could still see his massive body crouched down behind the wood. It was rather funny, seeing the large man so panicked about getting his dog to listen. It kind of reminded you of that one video from BBC were a professor was being interviewed and his baby and nanny showed up in the background. While Henry tried to get Kal’s attention, the dog just sat next to your legs, and smiled when you pet him behind his ear. He was your good boy.
You both knew there was no other option but to keep Kal here, once he saw you do your makeup, he wanted to watch and get his ‘makeup’ done as well.
Henry also saw the look in Kal’s eyes and let out a sigh. Might as well stay with his two loves. He stood up from his position and walked to you, wrapping his sweaty but oh so save body around your figure, and placed a prolonged kiss on the exposed skin just by your shoulder. So far for taking it slow… He pressed himself thighter against your back, hiding his face in the crook of your neck and intertwined your hands, slowly rocking you two back en forth. “You look beautiful, my love,” he whispered, so only you could hear it, at least you hoped the camera wouldn’t pick that up. You let out a little giggle, like the inner schoolgirl you were whenever he was around you.
“Kal loves when Y/N does his makeup as well, don’t you boy,” Henry explains with a smile and looks down at the bear by your bare feet. Kal gives a small ruff and sweeps his tail eagerly. “Did you show them what you made,” he asked you with a wide smile, and looked straight in to the camera, “she worked really hard on that design, so I hope you all like it,” he declared proudly.
You ended up doing your makeup routine with your two boys in the background. Henry left for a few minutes to shower in the second bathroom your hotelroom had, and came back clad in a pair of light jogging trousers and a sweater. Even though you were inside, it was still a bit too chilly to walk around in short sleeves, being mid-winter and all. He just sat on the small wooden bench by the door, still in frame for everybody to enjoy and behold. His hair now damp. He was reading in a book and patiently waiting for you to get ready, occasionally looking up and laughing when you would wet your hands or Kal’s special makeup brush in the sink and pretend to do his makeup. The dog would bark excitedly and give you kisses. “Wow Kal, you look so pretty,” Henry told the big floof with the chuckle.
“Okay, this was my -somewhat- everyday makeup routine! Thank you guys for watching this chaotic mess, hope you laughed a bit, bye-bye, 再见!” How do those vlogger end their videos? Smash like and subscribe?
Behind you Henry looked up from the pages of his fantasy book and arched his brow, “Hey! No shout-out for your special guests? See you all next time!”
WOOHOO!! This is my very first fanfic, I really hope you enjoyed it. Liking, reposting and commenting would mean a lot to me! If you do repost this, please do not edit or copy my work. I worked really hard on this.
Much love, Nahmi xxx
Masterlist can be found HERE!
Want to be notified whenever I post something?
HERE IS MY TAG LIST!
#henry cavill fic#henry cavill imagine#henry cavill#henry cavill x reader#henry cavill x you#henry cavill fanfiction#henry cavill one shot#kal cavill#kalentine day#famous!reader#famous! y/n#asian reader#mixed reader#wasian reader#agegap#henry cavill drabble#one shot#fluff#henry cavill fluff#boyfriend henry#my writing#my work#non native english speaker#non-english reader#english8muffin fics#henry cavil x asian!reader#older! henry cavill#younger!y/n#henry cavill writing
985 notes
·
View notes
Text

Full glam makeup routine💋
I mentioned in a previous ask that I would write out my makeup routine, so here it is lovelies!
First up: Base
Moisturize 👏🏻before 👏🏻your 👏🏻 foundation
I don’t care what skin type you have, you need a moisture barrier under all of your makeup!
I use a CereVe morning moisturizer with SPF because I have a paler skin tone and want to protect my skin.
Then, you can apply a primer if you wish. A silicone based primer for pore reduction or another layer of hydration if your skin is drier.
For foundation: I love the Too Faced Born This Way Foundation. They had a shade for my skin tone which can be difficult to match, and the formula is superb for that glam coverage look. I’ve also used Fenty Beauty and enjoyed it, as well as Wet n Wild photo focus foundation.
Concealer: I’ve been using Tarte Shape Tape because, again, they had the right shade. This is very full coverage so be careful to avoid cake face. I apply it as a highlighting concealer.
Powder: Currently I’m using the Jaclyn Cosmetics face powder palette. I’m enjoying it so far, but I usually only set where my concealer is. A tried and true is the Laura Mercier translucent setting powder. It’s well loved for a reason. Another favorite is the beauty bakerie flour powder.
Setting spray: Someone would really have to convince me that paying top dollar for setting spray is worth it, because my wet n wild photo focus natural spray is all I need. I’ve used Urban Decay, and it’s good, but I really feel like a face spray doesn’t need to be that much money.
Blush, Bronze, Highlight:
Blush: I LOVE blush. I mean, I’m just obsessed with it. I sincerely feel as if it’s the most feminine makeup essential next to maybe lip gloss. My current favorite is the Jaclyn Cosmetics cream to powder blush stick. It blends out over anything even if you’ve already set with powder. It just makes you look youthful and supple. I also love Tarte Amazonian clay blushes!
Bronzer: I’m not huge into contouring, I mostly brontour ( a mix of contour and bronze) around the edges of my face and sides of my nose. I have a rounder face so I find harsh contour looks fake on me. I love Too Faced Milk Chocolate bronzer. It’s blendable and suits my skin tone. I do want to try cream bronzer again in the future because I find cream products look so natural and are great for layering with powder for a long lasting look
Highlight: It may seem like I’m a Jaclyn Hill super fan at this point, but I’m really not haha! I just recently detoxed my products and I’m only purchasing and using things that are high quality and work for me. And I placed a jaclyn cosmetic order right after that detox. So I used to have 10+ highlights, and now I have maybe 2. I really love Accent Light from Jaclyn Hill. And her mood light powder as well. I used to use the Hourglass ambient powder in Ethereal, as well as some Becca cosmetics highlights. I did use those up though!
Eyes:
Base: MAC painterly paint pot is my one and only if I use a base. Sometimes I just use concealer.
Shadow: Morphe shadows are great, I had a mini Natasha denona palette that tragically shattered 😩but I did love it, Colourpop shadows are really soft and lovely.
Glitter: Urban decay glitter liners are beautiful with such interesting reflect colors, Stila liquid shadows are stunning, Makeup forever loose glitters are perhaps the most stunning finely milled glitter in existence, and make sure to use Too Faced glitter glue when using loose glitters.
Liquid Liner: I’ve used quite a few liners in my day. I will recommend Stila Stay all day. But right now? I’m using ELF. And it works just fine. If you are prone to rubbing your eyes even a little, it isn’t for you. That’s the only downfall. I like the black and brown liners.
Pencil liner: I only use pencil liner for lining the water line in white. And the one I use is L’Oréal, but I used to love the NYX one in Milk. It’s a classic and it’s still selling out in stores to this day.
Mascara: I’m not going to even tell you the mascara I’m using right now because I hate it. It’s awful and I’m trying to use it up but I may give up soon. I used to love Tarte mascaras. I think the better than sex mascara isn’t worth it 🤭. Essence lash princess got the job done.
Lashes: I’m just now getting into lashes, but right now I use the classic Ardell wispies and I cut them in half. This is a great trick if positioning lashes is hard for you but you love the cat eye effect.
Brows: I use ELF tinted brow gel, occasionally a brown shadow. I’m not into brows very much though.
Lips:
Lip balm: Burt’s bees is good and I keep that in my purse usually. But my go to lip care is the Laniege lip mask. I’m obsessed with it.
Liquid lipstick: MAC liquid lips have the best staying power. I wore one on my wedding day. Lip cushions from jaclyn cosmetic changed the game for me. I don’t care what people say about her, that product is bomb😂, NYX lip lingerie and soft matte lip creams are good too.
Cream lipstick: I just tried a Clinique lipstick and I love it! Definitely want more from them. PUR cosmetics came out with a Barbie line a while ago and my husband got me a lipstick from their collection and I’ve almost ran out I love it so much. MAC used to be a fav of mine too. Bite beauty has the creamiest formula that smells divine.
Lip liner: MAC liners are superb. Colourpop liner is super creamy. NYX liners are less creamy but great too!
Lip gloss: Fenty Beauty. Hands down. Literally the only glosses I kept when I decluttered.
Every day lip combo: MAC liner in whirl, jaclyn cosmetics lip cushion in last first kiss. Occasionally layer fenty gloss in fenty glow.
The PERFECT matte red lip: NYX liner in spicy, MAC liquid lip in feels so grand.
The PERFECT creamy red lip: NYX liner in spicy, Clinique pop lipstick in roses are red. Add fenty gloss in diamond milk for extra pop.
Tools:
Brushes: I have a lot of random brushes from beauty subscriptions, but I also love morphe brushes. I’m wanting to invest in very high quality ones, but I haven’t just yet!
Sponge: real techniques all day! I like it more than beauty blender.
Eyelash curler: I use a revlon one!
70 notes
·
View notes
Text
Makeup Products for Beginner
Whether you're new to makeup or have been experimenting with it for years, having a collection of beauty essentials that will help you to create a go-to everyday look is key. It's a lot easier to add fun or fashionable makeup products to your collection and incorporate them into your beauty looks once you've mastered the basics.
Makeup Essentials – Face:
1. Face Primer
While some people believe that face primer isn't necessary, I consider it to be an essential part of my makeup procedure.
Face primers have a variety of impacts on your face and makeup, but their main goal is to keep your skin smooth and your makeup appearing fresh all day. Whether you're searching for a product to regulate oil and/or acne, hydrate, smooth out uneven texture, colour correct, or anything else, there's a primer for you.
2. Foundation
Foundation is undoubtedly the most difficult component of your makeup regimen to master, because you must consider not only the level of coverage you like (sheer/natural, medium, or full), but also your skin type and undertones.
If you're new to foundation or aren't sure which type or shade is best for you, I recommend visiting your local Sephora, MAC, or department store and having a makeup artist assist you in selecting one that matches your skin tone and meets your coverage requirements. Requesting a sample is also a smart idea if you want to check how a formula feels on your skin before purchasing it.
Even if you prefer to buy foundation at a drugstore, I recommend that you get matched at a higher-end store first. This will help you figure out which colours to look for.
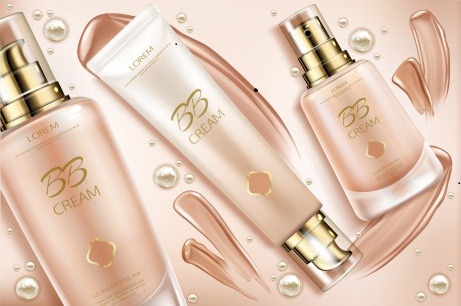
3. BB Cream
I prefer BB cream to traditional foundation because it gives a more natural appearance. If you're searching for a product with skincare advantages like moisturizing or priming, this is an excellent choice (some BB creams have primer built in).
Furthermore, if you are new to makeup, a good BB cream is a better place to start than foundation because it feels lighter on the skin, is difficult to overdo, and can be applied with your fingers.One significant disadvantage of BB creams is that they typically come in limited shade ranges and do not cater to darker skin tones.
4. Concealer
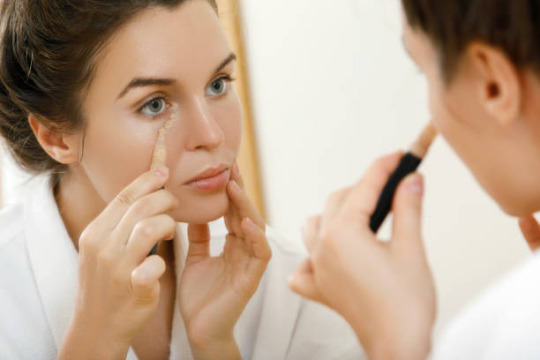
Concealer is a must-have if you have acne, dark circles, or any other type of discoloration.Concealers are available in full-coverage and sheerer-coverage formulations, and which one you should use depends on how much you want to conceal.
When selecting a concealer for acne and/or discoloration, choose a shade that is as close to your foundation/BB cream shade as possible for the most natural look.
Dark circles are a little trickier to conceal because there is so much variation in their shades and how they appear on different skin tones, but in general, a peach or pink-toned concealer will do the trick.
5. Blush
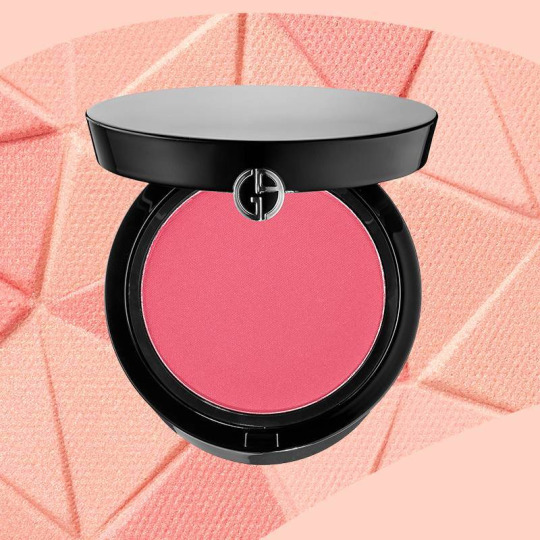
Applying blush can have a significant impact on your overall appearance, and I never leave it out of my makeup routine. Blush is especially important if you're wearing a foundation with more opaque coverage, which can leave your skin looking a little flat. Blush is available in powder, gel, and cream forms, with powder being the most popular. However, cream and gel blush have recently gained popularity.
When selecting a blush colour, choose one that will give you a natural flush. Regardless of your skintone, avoid going too bright or applying with too heavy a hand, as these can make you look clownish.
Pink and peach tones look best on fair-to-medium skin tones, while mauve, purple, and maroon tones look best on darker skin tones.
6. Highlighter
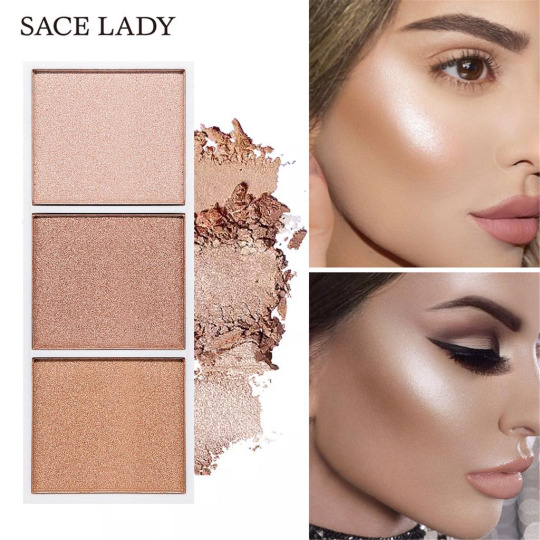
Highlighter, like many other beauty products, comes in a variety of forms, including powder, cream, liquid, stick, and powder/cream hybrid. Each of these forms has its own set of advantages, but for beginners, I recommend powder or stick because they are the easiest to work with.
My go-to highlighter application technique is to lightly dab it along the bridge of your nose, the tops of your cheekbones, your cupid's bow, and just below your brows. You can even use your highlighter as an eye shadow!
Finally, finding the right shade of highlighter, like finding the perfect shade of foundation, is dependent on your specific skin tone and undertones, so it's a good idea to test out different colours in person if possible.
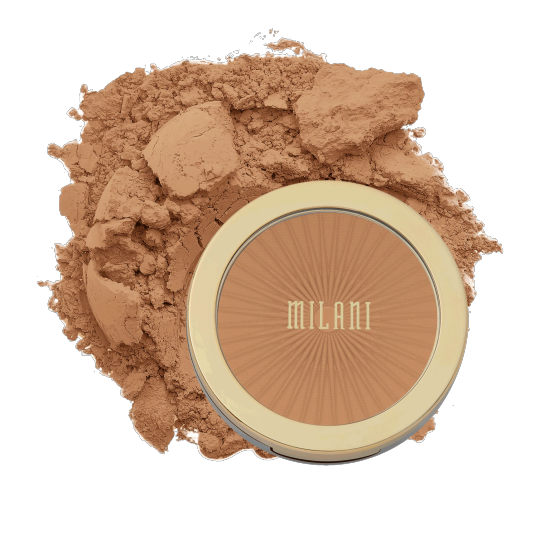
7. Bronzer
Using the right shade of bronzer is essential if you want to achieve a sun-kissed look. I suggest going no darker than one or two shades darker than your natural skin tone, and lightly dusting it all over the high points of your face for a healthy glow, or simply in the hollows of your cheeks (below where you'd put your blush) for a more chiseled look. In either case, use a light hand and blend thoroughly.
The choice between matte and shimmery depends on the rest of your look: If you're using all matte products on your face and want to add some radiance, try something with a bit of sparkle. However, if you're already wearing shimmery makeup, stick to a matte formula to avoid shine overload.
8. Setting Spray/Powder
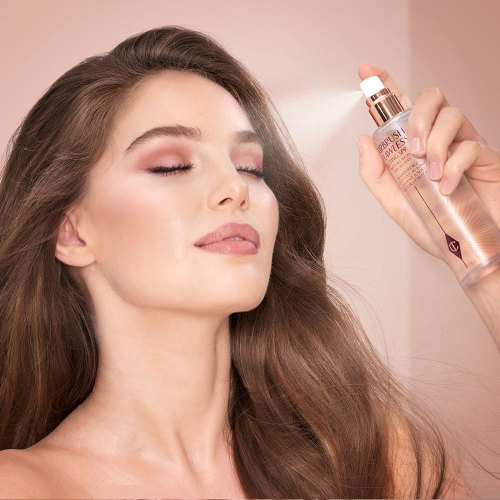
Setting spray/powder, like face primer, works to keep your makeup in place all day.
There are various formulations available depending on the type of finish you want (matte, radiant, etc.) and what skin care benefits, if any, you want your setting spray/powder to have (e.g. moisturizing, oil-absorbing, etc.). But, if you want your makeup to last, don't skip this step.
Makeup Essentials – Eyes:
9. Eye Primer
My eye makeup would literally be virtually gone within two or three hours before I started using eye primer, so it's been a lifesaver for me.
Not only should a good eye primer keep your eye makeup from sliding off, fading, and creasing, but it should also have a formulation that keeps colours appearing true to how they should all day.Keep in mind that eye primers aren't just for oily skin–there are a variety of hydrating, color-correcting, and anti-aging formulations in the market.
10. Eyeshadow
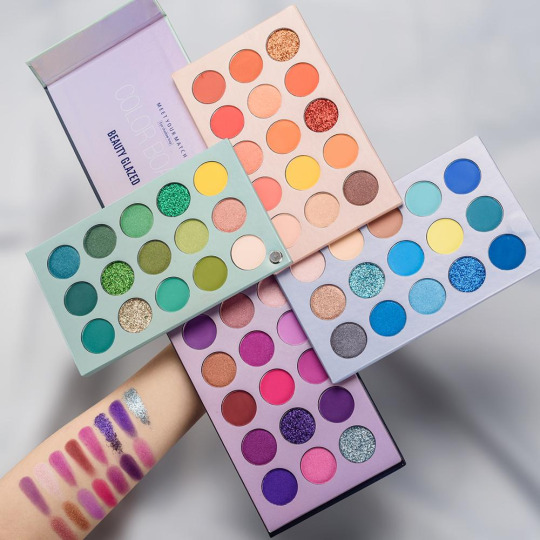
Eye shadow is my favourite cosmetic product, along with highlighter, because it comes in so many various hues and finishes and can be used in so many different ways.Finding makeup colours and tones that match your eye colour is a terrific method to make your eyes stand out.
Always define your crease, regardless of the style you're striving for - from natural to smoky. By blending the shadow into the crease, you may create depth to your eyes and make them appear larger. The key is to use a soft fluffy brush to build up the eye shadow in a back-and-forth motion.
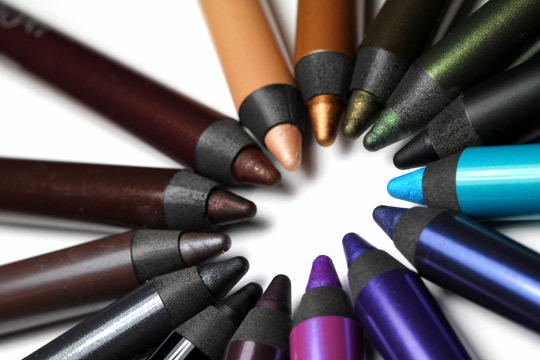
11. Eye Pencil
If I had to choose only one cosmetics product to wear before leaving the house, it would undoubtedly be eye pencil (or kohl). Because "eyes speak louder than words," I believe they should always be highlighted.
Always begin at the outside corner and work your way inwards while using an eye pencil. Always use tiny strokes and don't be afraid to press the pencil towards the waterline. You will not injure yourself while performing this task. Eye pencils are creamy and silky since they are made with the area in mind where they will be utilized.
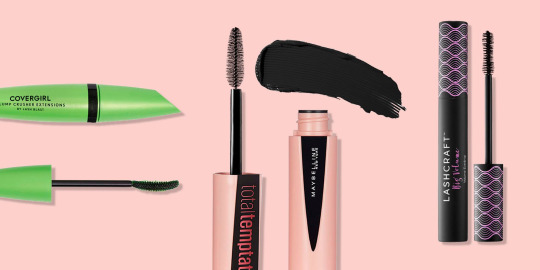
12. Mascara
Mascara has a magical way of bringing your entire eye look together, and it comes in a variety of formulas to lengthen, thicken, and curl your lashes.
Most individuals can get away with black mascara, but if you have really light-colored lashes, you might want to try a brown mascara instead for a more natural effect.
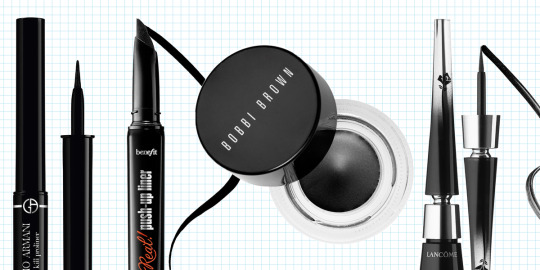
13. Eyeliner
Eyeliner, like mascara, may offer that additional something to truly make your eyes pop.
While black eyeliner is frequently considered a must-have, if you have lighter skin, try brown or dark grey. Eyeliner may be applied in a variety of ways, but my preference is to draw a fine line at the lash line and wing it out just a little beyond my eye.If you want to make your eyelashes look thicker, line the waterline with eyeliner. Eye pencils and kohl products created exclusively for this delicate area are available.
If you're concerned of messing up with liquid eyeliner, I recommend lining your eyes first with a similar-colored eye shadow or pencil liner, then going over that line with the liquid liner.
Makeup Essentials – Lips:
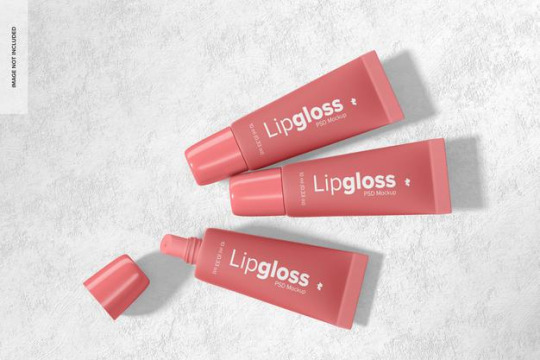
14. Lip Gloss
Lip gloss was popular in the early to mid-2000s, but has lately resurfaced, with trendy brands such as Anastasia Beverly Hills, Glossier, and Fenty Beauty all offering their own variations.
When you're in a hurry, don't have access to a mirror, or when the rest of your makeup is more dramatic and calls for a subtler lip, go for lip gloss.
15. Lipstick
You can't dispute that lipstick is having a significant moment right now: whether you prefer a liquid or bullet formula, a glossy, satin, or matte finish, or a glossy, satin, or matte finish, there's a lipstick out there to suit your preferences!
Beginners should start with a colour that is near to their natural lip colour, as this is the easiest to apply and remove.
Once you've mastered that, it's a good idea to invest in a basic red that works with everything and can be worn to class or on special occasions. For a softer look, try a glossy formula or a lip balm, or a matte formula for a more glamorous look.In addition, I recommend wearing a red lip with minimal makeup or none at all.
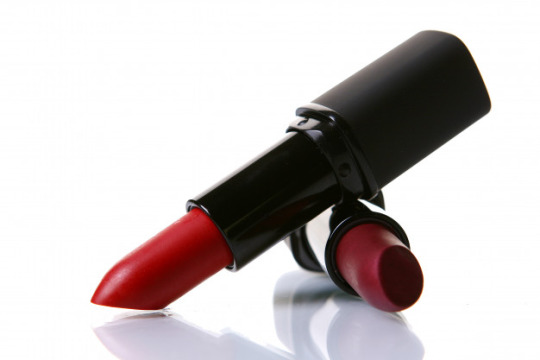
#makeup#bueaty#mua#fashion#makeupartist#cosmetics#bueatiful#eyelashes#eyeshadow#lipstik#looks#love#brushes
4 notes
·
View notes
Note
Hey! I was thinking of getting into makeup, as I am now 20 and am going out a lot more with friends than I used to in middle & high school. But, I have no. Idea. How to start. I have to sift through all kinds of different products (what's the difference between toner, bronzer, BB cream, concealer? Ahhhhh), different brands with different formulas and histories (some are problematic, apparently?) And I don't know how to apply and "create looks" and I am internally screaming. Please help.
The fact that I come across as someone who has any idea about makeup is a huge compliment! lol!
Since you’re starting out, I wouldn’t really bother with any of the high priced stuff except maybe for foundation. But even with that you might want to still stick with the drugstore or lower-priced brands just to figure out what colors work for you.
Some good non-problematic (at least as far as I know) affordable brands who are also cruelty-free are
Colourpop
Elf Cosmetics
Covergirl
NYX
BH Cosmetics
Essence
Stick with the basics in the beginning, some kind of cover up which depending on your skin could be a tinted moisturizer or full coverage foundation, neutral eyeshadow, a nude lip or lip gloss, mascara, and some blush. Maybe some eyeliner also, start with a pencil or gel liner. But that’s it for now. Don’t overwhelm yourself. Take it one step at a time.
Use Youtube to learn what certain products are and how to apply them.
And also make sure you’re actually practicing! You’re never gonna get better or learn if you don’t actually keep trying.
As you get better you can start adding new steps like concealer, bronzer, contouring, highlighters, etc. But for now just learn how to give yourself good base and how to do a nice neutral every day look.
As for problematic brands, truthfully it’s up to you to look into it to see if you feel what they did or didn’t do warrants not supporting the brand. The only one I would urge you to stay away from is Kat Von D. She hasn’t owned up to any of her shit, makes bullshit and nonsensical excuses for them or flat out doesn’t even address it, and honestly, from what I’ve been hearing (bc i don’t support her brand anymore) her makeup sucks now. So she’s just not even worth it.
I also really wouldn’t bother much with Morphe. They are kind of shady, supports shady people, and from what I’ve heard isn’t that great.
Oh and def don’t buy anything from Jaclyn Hill. And don’t go to her channel.
As for Mr. Star, that one is def up to you to decide. However I will say that there are plenty of other brands you can support that haven’t done what he’s done (and continues to do) that are just as good and possibly better. Soooo....but like I said that one is up to you.
I watch a lot of commentary on the beauty community so I know way more about the controversy and the drama then I do about the application of makeup lmao! But I hope that at least gave you a starting point!
7 notes
·
View notes
Note
QUESTIONTIME: 1. What are you watching in quarantine, 2. Do you have any goals in quarantine, 3. Beauty routine in quarantine. GO.
What are you watching in Quarantine:
I’m a CLOSET JOCK LEGASP (At least, on Tumblr), but I’ve been watching The Last Dance, the Netflix documentary about Michael Jordan and the ‘90s Chicago Bulls, which is absolutely FANTASTIC. Even if you’re not a sports fan (and I'm really not much of a basketball fan), the sheer athleticism on display is AMAZING, and the way the narrative is spun about the actual personalities on the team, it’s really as much a story about differing personalities as it is about sports. If you’ve watched any ESPN sports documentaries (My brother literally has a tin of the ‘30 for 30′ documentaries, and they’re also absolutely fantastic and highly recommended), it’s basically the same quality, just stretched out into a miniseries).
Do you have any goals in quarantine:
I just got offered a chance for my law paper to be academically published, so I’m just setting that up as well as getting my articling qualifications set up for admissions into law in Canada. I also signed up for this really cool program called ‘The Conqueror’ Virtual Challenge, which is basically a U.K. based running program, where it tracks you running marathon routes around the world in the comfort of your own neighbourhood, and awards you a medal at the end of it. So for example, I signed up for ‘The Inca Trail,’ which is a pathway following the Inca Trail right up to Machu Picchu virtually and it tracks your progress every time you run on a map.
I’m lucky because I’m in a country where you’re still allowed to go out for government-mandated exercise, so it’s basically forced me to become a runner. Even though I’m good at sports, I’m definitely not a runner, as I have shitty feet (plantar fasciitis since I was twelve/ more ankle sprains than I can count), plus athletically-induced asthma, so all my sports growing up were just sports where you could do bursts of energy and then chill for a while and catch your breath xD (I.E: Volleyball, beach volleyball, swimming, etc.). Consistent running has always been TERRIBLE for me, and I hated doing lines even in sports: I usually ended up coughing up blood and with terrible foot pain (Too much information, but there you go).
My whole point is, if I can do it, anyone can do it. You can set up to thirteen weeks to achieve your ‘marathon’ goal, so there’s no timed element where you feel like you’re going to kill yourself running, and I’ve been really careful in order not to roll my ankles and ruin my entire beach volleyball season if we’re able to come back in time (I.E: I got proper new trail running shoes, because trail running is easier on your feet than concrete, I tape my ankles and my feet before I go out, I literally drive to a park and stretch before jogging, that sort of thing). I just signed up this morning and I’m already around 5km in, so it’s something <3 (Plus there’s alternative routes like running the distance of the English Channel, the Great Ocean Road in Australia, the length of Hadrian’s Wall, etc. So just a fun way to motivate yourself for like, twenty quid xD)
Beauty Routine in Quarantine:
Um, get up and go? XD To quote the Gilmore Girls, “Copper, BOOM!”? xD Really it’s washing face with Dermalogica Special Cleansing Gel (The only face wash that works for my super-sensitive, reactive skin, but which is also very cystic-acne prone), Mychelle Sunscreen SPF28 Coconut (Another natural sunscreen brand I get from the States which is super-mattifying and doesn’t melt when you do exercise or sweat, but also doesn’t break me out), and maybe some Laura Mercier Concealer in 1N (The neutral, pale person shade) and some Physicians Formula Bronzer or Blush if I’m feeling really out there.
(For cheaper options for foundation/coverage, I go for NYX’s Bare With Me Tinted Skin Veil in 02 Vanilla Nude, or Covergirl Clean Fresh Skin Milk in 520 Fair. I actually like the skin milk so much I got a second ‘tan’ colour for summer which is 530 Fair/Light. I also use Maybelline New York’s Clear Mascara to move away stray hairs/sort my eyebrows, and also love Covergirls’ Clean Fresh Cream Blush in 330 Sweet Innocence). Top off with Lip Smacker, because I am a child of the 90s and will never get over good-tasting lip balm.)
I also spray in my hair Sun Bum’s 3 in 1 Leave-In Conditioner, which leaves my hair naturally conditioned and no need for straightening (which is what I usually have to do without it, because my hair is thick and literally like Book!Hermione’s). If I’m feeling fancy I add the Sun Bum lightening spray, which is helping to lighten my hair for summer from dark dark blonde (which looks almost ash mouse brown) with some highlights to a lighter shade of ash mouse brown. Brilliant. xD
And then for an evening routine, Benton’s Aloe Propolis Soothing Gel, Lush’s Enchanted Eye Cream (Again, if I’m feeling fancy), and if I’m feeling acne coming on, Dermalogica’s Overnight Clearing Gel.
As you can see, I’m pretty much paired back to being a minimalist with my beauty routine and I’m really partial to non-overtly reactive ingredients that burn your face/hair off. I’m usually bad with fragrance, or overt alcohol that strips your skin, so if you’re really sensitive to that sort of thing, you might want to try some of the stuff I use. If it DOES have fragrance, it’s usually something natural, like Sun Bum’s 3 in 1 Conditioner having coconut oil. I’ve reached the point as an old crone in her mid-twenties that if it ain’t broke, don’t fix it. xD (Oh, and my Dad hates how many deodorant sticks I go through per year, but I’m obsessive about smelling good so I probably have three deodorant sticks on the go at any given time (One in my bag, one at home, one in my workout bag/the car so I’m not ever in the situation where I maybe applied less liberally than I would have wanted to. If I didn’t have deodorant I think I might actually die: I’m pretty sure I just have horror daydreams where I lift my arm and kill the population of a small town. I’ve been abused by other people’s horrible B.O. on trains/public transit and I refuse to subject anyone else to it. xD)
#this was random but fun xD#I'm really more of a stickler for good skincare than being the level of makeup you seen Instagram and such but hopefully this helps someone#personal#answers#anonymous#but seriously go watch the last dance#I've watched through it twice now and it's so good
1 note
·
View note
Text
Playing with Color...a Crash Course on Hair

I’ve loved playing with color and hair since I was a kid. I was the one who was constantly trying to put my Barbies’ (or rather Christie as Barbies were rare around my house) and other dolls’ hair into complicated styles. Fast forward to when I was old enough to have my autonomy recognized, and I was always interested in seeing what I could do with my hair.
The first time I ever wore extensions was in college and it was a safety net as much as a cute style. I got braids because I wasn’t sure what kind of hair stylists I would find near my university and I didn’t want to take chances. And then I fell in love with extensions and wore them all the time. Then in my mid 20s I went natural and decided that if I wanted to play with texture or color, I would wear extensions, otherwise, I’d embrace my own curl.
And this year, now that I’m a WAHM who isn’t working with conservative clients anymore, I’ve decided to be more adventurous and take risks when it comes to fashion, makeup and hair. So, to that end, I bought this really cute lavender purple wig from Amazon at the beginning of the year, but I put off really playing with it until now. And after a few tweaks, it turned into this super cute style that—although I wouldn’t rock all the time—would make a great alternative on days when I want to be unique.
This got me thinking about how many brides might turn to extensions to help achieve a hairstyle on their big day. But for a lot of people, extensions and wigs can be intimidating if you’ve never worn them. So, to that end, here’s a crash course on wigs. And as a frame of reference, while I normally wear full lace human hair wigs, this purple girl is a synthetic lace front. For the curious, I love fantasy colors, but a color like this isn’t something I’d wear all the time, so a cheapie synthetic is a smarter option.
Unless you go with a custom unit, all stock wigs need to be tweaked
As an example this girl I’m wearing has gone through three rounds of customization.
When I first bought her, she was ridiculously long. So I trimmed about five to six inches off the back and she’s still sitting at mid back length.
This girl came with about three inches of lace front that was set as a free part—meaning you can part it in any direction you prefer. But I love a deep side part, usually on my right side. So to “force” the part, I tweezed the frontal portion to create this clean part.
Normally, if you order from a better brand/store, you can specify lace colors, even for stock units. But when you order from Amazon and it’s this cheap (less than $40), you get whatever they give you. So, if you’re not “nude” that lace is going to be a big “look at me sign”. To make it look more believable, I used foundation on the underside of the wig to make it better match my color.
With this particular wig, she’s a tad big. So, even though there are adjustable straps to help tighten her down, she’s still a little loose on me. To the point that you could clearly see a space between my head and the wig. So, I sewed a piece of elastic (like what you can buy in fabric stores for making waistbands, etc) into the cap to give me a snugger fit.
Also something I’ve never experienced with a wig was the fact that this was made in such a way that the front hairline sort of stands up like someone lightly teased the hair. In theory it would be cute. But since I don’t glue my wigs down (I like my edges and I have adhesive sensitivities), you could clearly see my sideburns where the wig isn’t attached because the hair had too much height and fell at an awkward place. So, I took a large barrel curling iron (~2 inches) and on a low heat setting (220F to 240F because it’s synthetic and synthetics typically can’t handle heat) gently pressed it onto the front hairline to make it lay down.
Synthetic wigs can be shiny so I used dry shampoo to help create more texture and minimize shine.
If you’re comfortable doing your own hair, all of these types of adjustments are easy to do and can take you as little as an hour total. If you’re not, find a friend who’s good at hair or take your wig/extensions to a stylist who can hook you up.
Although I didn’t do it with this wig, I normally also do a serious cut and color as well. And the color process usually includes bleaching to lift the hair and then a rinse to deposit color. But don’t use bleach on synthetic hair, it’ll damage it!!! I’ve covered these processes before so if you want more info on the basics of hair coloring, head on over to my Overtone or Clairol articles.
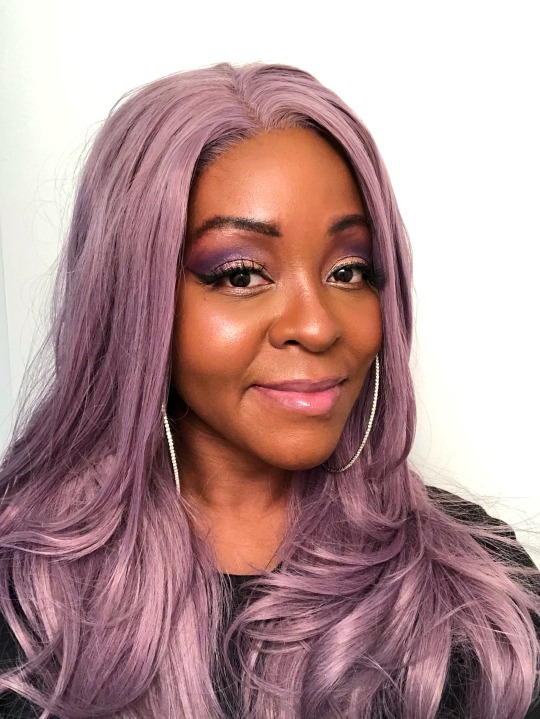
Full disclosure because I’m not much of a photo editor normally. But this particular wig, even though it looks undetectable under natural light photography (pic above) and to the naked eye, has a hairline that looks like a beacon when you use a ring light. So, even after all the customizing I did, because I don’t glue my wigs and the front hairline fit is a tad funky, it left a pretty serious line of demarcation. So, I had to go in and clean up that line on my ring light pics because it was ridiculously unsightly.
And since I decided to be adventurous with this wig, I also wanted to do a playful makeup look that hyped up that aspect. So, I created this fun rose gold and purple look that’s also way outside of my comfort zone. I amped up the eyes and placed three (yes three!) different type of highlights to create that high wattage effect you see. Even though this is way bolder than I would normally go, it’s also pretty wearable. I ended up having to run errands after I finished my makeup and got a few compliments for the hour I was out. Full makeup details are below.
And if you’re in love with this wig and want to make it your own, head on over to Amazon and go shopping.
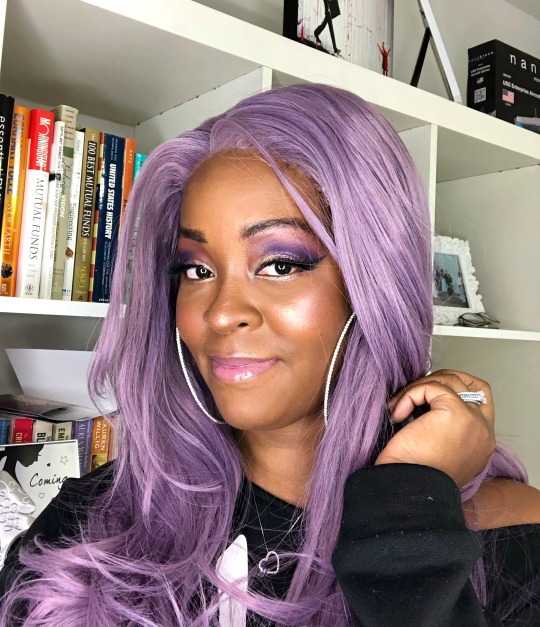
(In the pic above you can see how the hair seems lifted from the roots. That’s the awkward tease effect I was talking about earlier. In the pic below you see that I was able to force the hair to submit with my curling iron.)
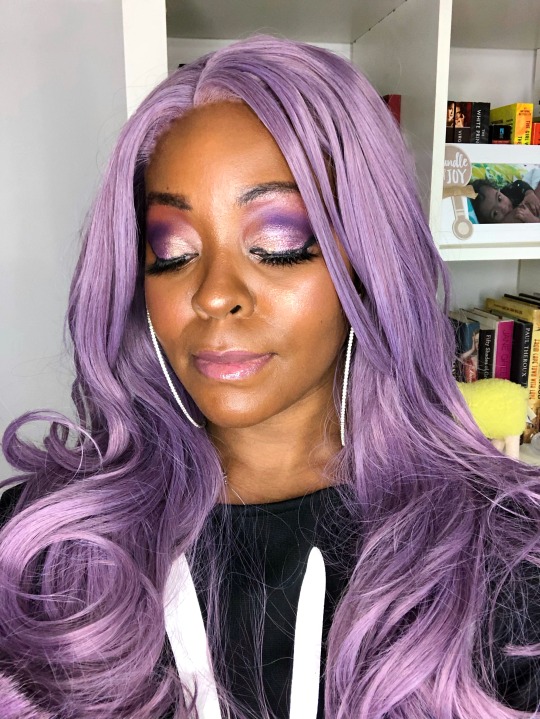
Full Makeup Details
Primer: E.L.F. Cosmetics Antioxidant Booster Drops + IT Cosmetics Bye Bye Lines Serum Foundation: Fenty Beauty Pro Filt’r Foundation in 420 Brows: NYX Cosmetics Love Contours All Palette Dark Eyeshadow Pan Brow Contour: E.L.F. Cosmetics Complete Coverage Concealer in Dark Eyeshadow: Morphe 35P Plum Pleasers Palette (all over lid base + dark purple), Coastal Scents 28 Neutral Palette (inner upper lid red-brown shade), Stila Glitter & Glow in Tulip Twinkle (outer shimmer shade), Pixi Beauty Fairy Dust (discontinued—inner shimmer), Naked Cosmetics in Sierra Nevada SN #02 (inner corners), top secret shade (lower lash line) Eye Liner: E.L.F. Cosmetics Cream Liner in Black Lashes: Kawaii Girl Cosmetics Odaiba Under Eye + Contour Concealer: L.A. Girl Cosmetics HD Pro Concealer in Orange, IT Cosmetics Bye Bye Undereye in Deep Rich, and Kevyn Aucoin Etherealist Super Natural Concealer in Deep EC 08 Contour: Black Radiance True Complexion Contour Powder Palette in Medium to Dark Setting Powder: Laura Mercier Translucent Loose Setting Powder in Deep Blush: Kevyn Aucoin Neo-Blush in Sunset Bronzer: Buxom Cosmetics Divine Goddess in Athena & NYX Cosmetics Strobe of Genius Highlight: Kevyn Aucoin Neo-Limelight in Ibiza Lips: Sara Happ The Pink Slip Lip Slip
Full disclosure: I’m an influencer for Kevyn Aucoin, Pixi Beauty, and e.l.f. Cosmetics. I am also the owner/founder of Kawaii Girl Cosmetics. Occasionally I post affiliate links so I may receive compensation on some of my posts.
#hair#fantasy hair#beauty review#beauty tips#hair tips#hair care#hair color#wigs#wig styling#makeup#bridal beauty#beauty
1 note
·
View note
Text

Contouring can be a pretty intimidating step in makeup but trust me when I say, it’s the best part of makeup and very simple! Its what sets you apart from the rest. Knowing this technique can be life changing. I have the most fun when I’m doing my face makeup. There’s something about a great base that gets me so excited. Some girls love eye shadow, some love lipstick, I truly love face makeup in general; contour, highlight, foundation, concealer, etc. I live for a beat face and flawless skin! Keep reading to find out my tips on how to slay that contour game!
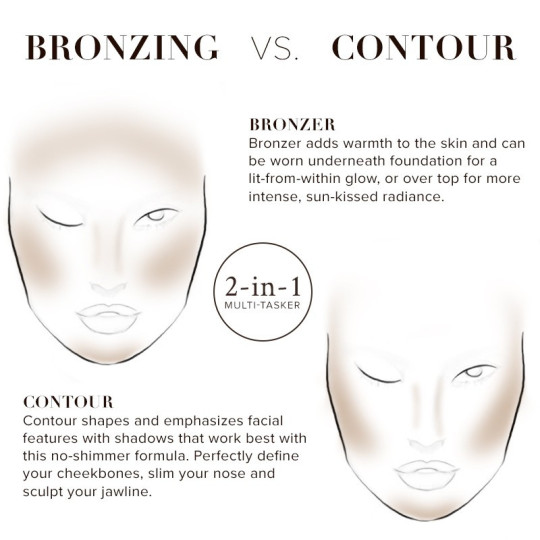
Photo Credits: temptu.com
BRONZER VS. CONTOUR
Before I teach you how to contour, you must be wondering, “what is the difference between contour and bronzer?” Just as the photo above depicts, contouring your face adds shape and dimension in places where a contour shade is applied. Kinda like adding shadows to emphasize certain features you want to draw attention to (e.g. cheekbones, nose, lips) or even mask certain features you wouldn’t want emphasis on (e.g. forehead that looks like a five-head, I’m guilty of this I must admit).
Bronzer on the other hand, simply adds warmth and colour back into your face. You’d apply this where the sun would naturally hit (e.g. temples, cheeks, forehead) and give your face a nice sun-kissed glow. After applying foundation and powder, our face tends to look flat and pale, this is where we add bronzer and contour to bring back that colour and dimension.
I can do a whole video on just bronzer, but you have to stay tuned for that! So make sure to follow me on IGTV because I’m doing a whole series on the “how to’s” and basics of makeup application.

Photo Credits: glossedboutique.com
FACE SHAPE GUIDE
I was quite fortunate to stumble upon this illustration below from “Glossed Boutique” another beauty blogger who has really amazing tips and tricks with illustrations. I’m not really good at that. You can check out her blog post for more information here.
She basically discusses the differences between face shapes. This really helps determine where to contour and where to highlight. You have to remember we all look uniquely different from each other, what I contour might not be exactly what you would like to contour. So finding our what parts of your face is best contoured and highlighted is really important.
Don’t worry! Do not give up just yet, it’s quite simple. Ask yourself these simple questions:
Is my forehead big? – If YES, contour and bronze. If NO, don’t contour just bronze.
Are my cheekbones pronounced? Is there a noticeable line right below my cheekbones? – If YES, simply bronze. If NO, contour and bronze.
Do I wanna emphasize my jaw? If YES, contour and bronze. If NO, bronze only.
Now this isn’t the exact formula to figure things out. I would still suggest trying it out and see what works for you. Remember, it’s just makeup, if it didn’t work out for you you can take it out at the end of the day.
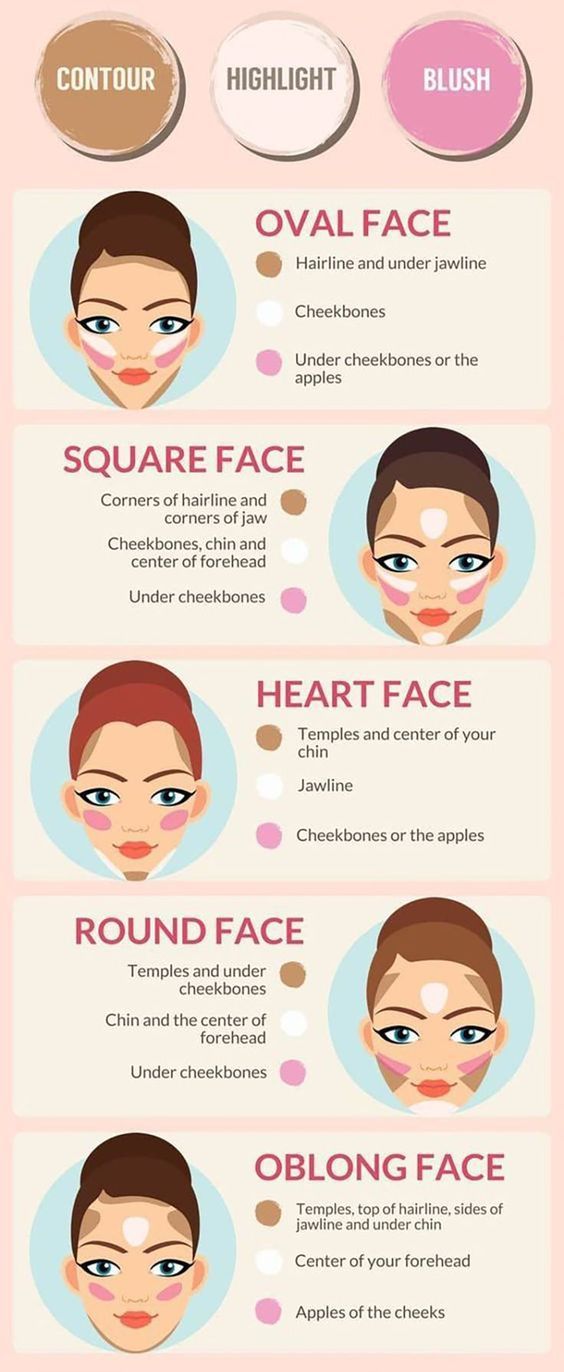
Photo Credits: glossedboutique.com
HIGHLIGHT, CONTOUR & BLUSH GUIDE
Again, another amazing illustration from “Glossed Boutique” above that gives you a guide on where to apply blush, highlight and contour. I wouldn’t say it’s completely accurate, but it’s a good base guide for beginners who have no clue at all.
As we discussed earlier, contour is used to add dimension, bronze for warmth, now what is highlight and blush? Where do you apply that? As a general rule, blush is best applied on the apples of the cheeks. It was designed to give you that illusion of “rosy cheeks”, a flushed and healthy look. I would suggest NOT smiling, coz then when you’re not smiling, the blush would’ve drooped down and that isn’t a flattering look.
Highlighter on the other hand is a completely different story. I would suggest applying this on the high points of your face where the light would normally hit, giving you the illusion of radiant skin. (e.g. Tops of the cheekbones, brow bone, inner corner of the eyes, bridge of the nose, & cupids bow)
I personally LOVE highlight. It gives you that glowing look that is just so gorgeous. I am guilty of applying too much highlight sometimes, but that’s because I naturally have dry skin. It’s that saying of you always want what you can’t have. Oily-skinned people want to look matte, dry-skinned people want to look dewy. The grass isn’t always greener on the other side but in this case highlight is always glowier! (is that even a word? oh well, now it is)
Processed with VSCO with al3 preset
Here’s the look I created on my IGTV showing how I contour and highlight with cream products as well as powder products. Click here to watch!
I love highlighting and contouring with creams! I find that it makes my makeup last so much longer, keeping me looking fresh all day! In my next tutorial I’ll show you a faster technique on how to contour with just powders. Perfect for those of you who would like a quick and easy look!
And that’s pretty much it! I hope you guys learned something about highlight, contouring and bronzing. Remember, it’s just make up! You can take it off at the end of the day. So keep practicing because it’s so much fun!
Thank you guys so much for reading! Subscribe to my Youtube Channel & make sure to follow me on my social media accounts; Instagram & Facebook, that is all @cescamandigma just like my blog name.
As always, all of the love and support is very much appreciated. Until the next post!
With Love, Cesca ♥
Ever wondered what's the difference between bronzer & contour? Highlight & Blush? Well, here's a guide on how to slay the Highlight & Contour Game! Contouring can be a pretty intimidating step in makeup but trust me when I say, it's the best part of makeup and very simple!
9 notes
·
View notes
Text
The Importance of Good Makeup Brushes
All products and services featured are independently chosen by editors. However, WWD may receive a commission on orders placed through its retail links, and the retailer may receive certain auditable data for accounting purposes.
An artist is only as good as their tools, and we’re not just talking about painters. The same rule applies in the realm of cosmetics: Your makeup can only be as good as your applicators, which is why you should upgrade your collection to include the best makeup brush sets — to ensure that your every beauty need is met.
Expertly curated makeup brush sets come stocked with high-quality options that cater to the face, cheeks, eyes, brows, and more, but if you’ve yet to master the art of contouring, defining, shading, highlighting, no worries; you don’t have to be a professional to operate this fine equipment. According to celebrity makeup artist and brow expert, Danielle Kimiko Vincent, founder of KIMIKO, everyone from beginner makeup moguls to celebrity artists can benefit from investing in a complete set.
“I love a good brush set because it can encourage you to start experimenting with new techniques that you might not have otherwise considered,” Vincent tells WWD over email. “For example, an angled eyeshadow brush can be used in many more ways than a standard flat brush. You might learn to create a color wash with the wide section of the brush, and then use the narrow side to create an accent with a darker color.”
It also helps that there’s “usually a price break,” when you opt to purchase an entire set versus individual brushes, Vincent adds. “Even if one of the brushes doesn’t become a favorite, you’ll likely make use of most of them, so the value is there.”
How To Shop for the Best Makeup Brush Sets
While makeup brush sets are an excellent investment, like anything else, not all sets are created equally. Ergo, when shopping for the best Makeup Brush Set, there are some key details to consider.
Synthetic vs. Natural Hair
In an exclusive interview with WWD, global makeup artist for Jane Iredale, Nechelle Turner explains that bristles on silicone mask brush are either natural (sourced from animals like squirrels, goats, and ponies) or synthetically made from nylon, polyester, or other synthetic fibers. Natural hair brushes, Turner says, have cuticles, making them porous, therefore, they attract and keep the product in the brush, which ultimately results in a more sheer application. “Their porous nature can also make them a breeding ground for bacteria,” Turner says, adding that natural hair brushes also tend to be a higher price point and their longevity is questionable.
Synthetic brushes feel more like natural hair brushes and are nonporous, therefore they “pick up and distribute more product on the skin for a more defined and more precise application,” Turner tells WWD. That being said, because synthetic brushes pick up and distribute more product, Turner advises using a lighter hand. It’s also worth noting that synthetic brushes that are stiff or have a shiny coating can result in a streaky makeup application, so you want to look for fluffy, softer bristles.
“In either case look for shedding,” Turner warns. “Shedding or lack of shedding bristles is a good indication of the quality of the fibers in both cases.”
Brush Count
Be realistic about how many brushes you need and how many brushes you’ll actually use. “If you’re advanced and like to try new techniques and looks, then a larger set with a wide range of variety will suit you best,” Vincent tells WWD. “If you’re relatively simple with your makeup, then an edited set will be great for you.”
Vincent tells WWD that as far as length goes, for a personal makeup bag, medium or shorter handles work well overall, but for a professional makeup artist, longer handles are ideal for powder and blush application. “This allows me to view my client from slightly further back, giving me a fuller picture of what I’m creating,” she says.
As for handle material, there are two options: wooden or plastic. “This may not be important for everyone,” Vincent prefaces, “but specifically for natural brushes, I prefer a beautiful wooden handle and brush hairs that have been hand cut and tied. This usually means high attention to detail has been taken with the taper and placement of the brush hairs, which I find translates to a more refined lay-down of powdered products.”
With sets geared towards beginners, pros, and every mastery level in between, the best makeup brush sets accommodate a wide range of beauty abilities with their basic, essential, and expert brush pairings. Below, find the best makeup brush sets that will satisfy every beauty buff’s skillset and budget.
1. BS-Mall Premium 14-Piece Brush Set
The BS-Mall Premium 14-piece brush set is one of the best makeup brush sets on amazon. With over 79,000 reviews (the majority of which are 5-star) to date, customers rave BS-Mall synthetic hair brushes are “soft,” “high quality,” and “comparable to high end brushes.” The 14-pc collection includes nine precise beard brush for shaving, as well as five chunky kabuki brushes for blush, bronzer, foundation, and other face product application. A travel case is also included with every purchase for easy storage.
One of the best affordable makeup brush sets on the market, EcoTools brushes are also (as its name would suggest) eco-friendly. Each tool is constructed from 100% recycled, vegan-friendly, cruelty-free materials and the collection comes packaged in tree-free paper made from cotton and bamboo fibers. The Day Beautifully Brush Set consists of the brands core collection of five brushes (including an angled foundation brush, blurring brush, defining crease brush, angled liner brush, and full blush brush), as well as three how-to beauty look cards to help simplify your routine.
Vincent tells WWD her brand’s essential brush collection is particularly excellent for “stepping up your brush game while keeping your makeup bag curated.” Each brush included in the set is hand cut, constructed with cruelty-free materials, and is designed to be multifunctional, ensuring you can create more looks with limited tools: “Three of the four brushes are dual-ended (with caps), so you’re actually getting seven brushes; a do-it-all brush for face, two essentials for eyes, a synthetic concealer and lip brush, and a brow and lash brush.”
Bridal and celebrity makeup artist, Cara Lovello tells WWD this set from EIGSHOW is one of the best makeup brush sets for beginners available on Amazon. “The brushes are affordable and good quality,” Lovello says, adding, “they don’t shed or fall apart.” The brand’s 15-piece Jade Series kit includes all the tools needed to create precise, flawless looks, from a foundation brush to various eye makeup tools. The brushes are made with vegan-friendly bristles sourced from corn silk fibers and birch wood handles, and come packaged (and separated) in a cosmetic bag made from recycled clothing and linen fibers.
The Tarte Cosmetics Goal Getters Contour Brush Set features five complexion brushes the brand guarantees will “sculpt, strobe, and perfect” your complexion. Inside, you’ll find the Bronzer Brush, Contour Brush, Foundation Brush, Concealer Brush and the Highlighter Brush, all decked out in rose gold sequins and topped with baby pink bristles. Reviewers give the set just shy of a 5-star rating, and love the set for its quality, as well as its overall aesthetic.
A number-one bestseller on Amazon, the Bestope Makeup Brush Set is stocked with 16 brushes that cater to the face, lips and eyes. Available in five colors and featuring soft and dense synthetic fiber-made brushes, this versatile set ensures that you have everything you need to contour, highlight, blend and shade.
Perfect for beginners, the Real Techniques Everyday Essentials makeup brush set covers all of the basics with its pro-curated pairings. Featuring brushes for the face, cheeks and eyes, the set includes the brand’s RT 400 Blush, RT 300 Deluxe Crease, RT 402 Setting and RT 200 Expert Face brushes, plus the Miracle Complexion Sponge.
Created with the eyes in mind, the Sigma Beauty Basic Eye Brush Set features seven brushes designed for eyeliner, eyeshadow and brows. Made with the brand’s exclusive synthetic antimicrobial fibers, securing them as one of the best vegan makeup brush sets on the market, these quality brushes are engineered to better hold, apply and blend products. The set includes the E40 Tapered Blending Brush, the E55 Eye Shading Brush, the E60 Large Shader Brush, the E70 Medium Angled Shading Brush, the E30 Pencil Brush, the E65 Small Angle Brush and the E05 Liner Brush.
Renowned for their exceptional blending, innovative Cosmefibre technology and ergonomic construction, the Artis Elite Makeup Brush Set is easily one of the best professional makeup brush sets available. It features the brand’s best-selling brushes for seamless, expert-level application. Inside, you’ll find the Oval 10, Oval 8, Oval 6, Oval 4, Oval 3, Linear 6, Linear 3, Linear 1, Circle 1 and Circle 1R brushes.
Jenny Patinkin’s Luxury Six-Piece Vegan Cosmetic Brush Set includes a curated collection of multipurpose, multiuse makeup brushes that can be used with cream, liquid gel and powder products. According to the brand, the brushes features synthetic fibers that are finer than natural hair alternatives and packed with 2.5 times more bristles than conventional brushes for a soft feel and seamless application. The set also comes with a stylish vegan croc-embossed case for travel.
A travel-sized makeup brush collection that is available in five colorways, the Spectrum Collections Jet Setter set ensures that you’ve got all of your makeup tools in one convenient place. The eight-piece kit includes the B01 Buffing Foundation Brush, the C03 Tulip Power Brush, the A05 Angled Blush Brush, the B08 Magic Wand Powder Brush, the B06 Tapered Blender Brush, the B04 Angled Shader Brush, the A16 Precision Crease Brush and A24 Double Ended Brow Styler Brush.
If you’re new to the makeup scene or you’re not a regular makeup user, you need to understand the importance of quality makeup brushes. A lot of makeup newbies and amateurs do not realize the importance of quality tools and brushes, and this should not be so. Most of them do not even know which tools and brushes to buy, and this article will help them through a number of issues, including identifying the right tools to buy, and the importance of these tools.
Many people need makeup for a number of reasons, and no matter your reason for using makeup, you need the right tools, and you need tools of the best quality. When starting out, you need original and high-quality brushes, including (the basics) a liquid foundation brush, a powder brush, a concealer brush, a number of eyeshadow brushes, false eyelashes some lip brushes, eyeshadow brushes, and a buffing brush.
Why are quality brushes actually important? Why are they better than cheap brushes? A lot of people ask these questions, and there are many reasons why quality brushes are important. These reasons include:
Quality brushes are better for your skin: Your skin deserves the best, and quality brushes will give your skin the very best. Quality brushes should feel soft and gentle against your skin. If a brush feels rough and scratchy, then it is of low quality and should not be used on your skin. If it’s also a brush with bristles that fall out all the time, it is not of good quality. When you use these low-quality brushes, it will lead to skin irritation and visibly faster aging.
Buying quality brushes saves you money: While it might seem expensive at first, making the decision to buy quality brushes will actually save you money in the long run. If you decide to buy cheap brushes of low quality, you will have to keep replacing them, and this will cost you a lot more money than if you had just gotten the slightly more expensive ones at first. Also, quality brushes have the ability to last for years.
Your makeup turns out better when you use quality brushes: Quality brushes improve the final look of your makeup. They make application and blending easier, and you end up having a smoother, well-done, and more attractive look. If, for instance, you use bad eyeshadow brushes, your eyeshadow will come out looking tacky and totally unattractive. Once you make use of quality brushes, however, your eyeshadow will look as great as possible.
Even though it is expensive, you have to invest in great brushes. You get to save money, quality brushes have longevity, quality brushes are good for our skin, and they’re better for your makeup in general. For these reasons, you need to make the decision to get quality brushes today.
1 note
·
View note
Text
Special Events Makeup Routine
Prior to bouncing into a first trimester recap and some extremely late summer posts, here's one that has been sitting half-completed in my drafts for, gracious, about a month. Helpfully, the Beautycounter items I'm sharing are largely 15% off this moment, which just happens more than once per year, so perhaps my dawdling was intended to be ;)
2019 has been a time of Wedding Makeup Artists Near Me for us. For reasons unknown, we appear to substitute… a year stuffed loaded with weddings, then, at that point a year with none. In the spring, we went to three out of five weeks and it was a particularly fun tornado, particularly considering we kicked it off with my sister Dana's wedding. She just got her photographs back from the amazing Jen Dillender (sneak look underneath!!) so we have been delightedly remembering the day while looking through them over the previous week. On somewhat of an egotistical note, I was truly glad to see that my cosmetics ended up good overall, since I did it without anyone else's help. I had been content with my arrangement to do as such until prior in the spring when out of nowhere (perhaps the difference in season or my chemicals?), it seemed like my cosmetics was unexpectedly sitting all over distinctively and everything except vanishing by the evening.
Before Dana's wedding, I got a couple of new items to balance my daily schedule and make the final product more event prepared. I was so content with the outcomes, I continued to do my cosmetics precisely the same way for the following two weddings we joined in. The best part is that by far most of these items are what I would consider "more secure"– they score low on the Think Dirty application or potentially are from an organization whose fixing determination measure I trust. As you all know, I'm a long way from the most dynamic Beautycounter expert. The greatest positive effect my association with the organization has had on me in the course of the most recent two years, however, is that it has helped me to be demanding about the fixings in the items I utilize every day. After discovering I was pregnant, I didn't need to contemplate whether my day by day items were pregnancy-safe… I realize that they are, and that feels enabling to me. Alright, getting off my platform :) Here are the (generally) more secure items I've been utilizing for unique Makeup For Special Events this season that look incredible, photo well, and wait the entire day!
Cream: One Love Organics Skin Savior Balm
Groundwork: BareMinerals PrimeTime Foundation Primer*
Establishment: BareMinerals Original Loose Powder Mineral Foundation in Fairly Light
Setting Powder: BareMinerals Mineral Veil Setting Powder*
*I really purchased this preliminary unit to test the groundwork and setting powder prior to resolving to full sizes. I particularly love the groundwork and quickly added it to my every day schedule.
Concealer: Beautycounter Touchup Concealer Pen in Light
Bronzer: Beautycounter Radiant All Over Bronzer in Dune
Become flushed: Beautycounter Color Pinch Cream Blusher in Hibiscus
Temples: Glossier Boy Brow in Brown
Eye shadow: a blend of a few shadows from my Beautycounter range, which is like this one
Mascara: one layer of Glossier Lash Slick + one layer of Lancome Definicils (the last isn't really my most loved I simply end up having an example container of it. Any "volumizing" mascara you love would work for the subsequent coat.) P.S. For Dana's wedding, I didn't do this mascara schedule, and all things considered, asked the cosmetics craftsman for bogus lashes.
Lipstick: Beautycounter Color Intense Lipstick in First Date (LOVE this tone so a lot, and this sort of lipstick is my greatest Beautycounter fixation. It's the lone sort of lipstick I wear now.)
Setting Spray: Urban Decay All-Nighter Long-Lasting Makeup Setting Spray (This is least spotless item on this rundown, which is the reason I just use it for occasions like weddings. On standard days, I utilize this perfect sunscreen/setting splash.)
0 notes
Text

I know this is 3-months overdue but better late than never, right? Here’s me trying to make a comeback. Let’s see how long I can last until my next hiatus lol.
2017 was definitely another year of beauty obsession and consumption. Probably one of the best years in the field’s industry for impressive trends and expressive creations, too.
For the rest of this post, I will be discussing my favorite products of 2017. Not all categories are included and not all highly talked-about products will be discussed (i.e., I do own the Huda Beauty Desert Dusk palette and the Jaclyn Hill x Morphe palette, but I haven’t had time to play around with it).
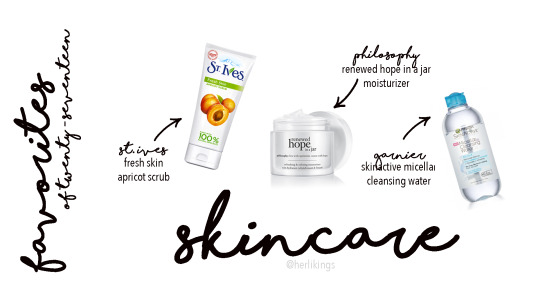
Let’s start off with skincare...
I’m at that age where I want to focus more on my skin, but also do not know exactly what I need for my age and skin type. However, among all the skincare products I recently started to accumulate, these three have been my tried-and-true for awhile...at least enough for me to continue repurchasing.
1. I love to my Clarisonic with the brand’s own cleanser, don’t get me wrong. However, I personally feel like my Clarisonic does not get down deep in my skin like an exfoliating scrub. After using St. Ives Fresh Face Apricot Scrub my skin feels more refreshed and cleansed. The added texture from the walnut grains, with the light smell of the apricot extract, is a pleasant way to wake myself up in the morning, especially for mornings after a long-wear of makeup. I personally keep my bottle in my shower.
2. I classify my skin to be more on the normal/oily side of the spectrum. I often go through phases of dry patches on my skin especially once fall and winter comes around. I like to believe my skin is a bit sensitive after some failed trials with facial masks, so I wanted a moisturizer that I knew wouldn’t irritate my skin. I used the Neutrogena Hydro-Gel Moisturizer for Very Dry Skin for awhile but it was alright. I repurchased it even thought I felt as if my skin was not fully hydrated; it felt like the gel sat on top like a hydrating primer. I forgot how I was convinced to try Philosophy’s Renewed Hope in a Jar Moisturizer in the first place but I’m glad I was willing to try it out during my time with Ulta Beauty. A little does go a long way but my skin always feels firm and perfectly hydrated (but not too hydrated).
3. I am still trying to get my mind wrapped around the use of micellar waters but I find this one to be especially handy in my kit. I like to use this with a cotton pad after using a makeup wipe. This is also my go-to product when I need to take off my stubborn falsies. It’s super gentle on my natural lashes but strong enough to take the lash glue off.

I truly believe foundations was one of my highly purchased product for 2017. In the past, I rotated between 3-4 different foundations because I did not want spend a lot on just one bottle once I run out (aka I preferred to wear drugstore foundations as often as possible because of it’s pricing compared to high-end formulas). However, I started to notice the benefits of investing in prestige foundations for many reasons (i.e., coverage, finish, and color match [!!!]).
Disclaimer: I am not including primers this year. To me, I feel like I didn’t find at least one primer that made me go, “WOW this is amazing.” Nonetheless, I still use primers as part of my makeup routine since I already have some in my kit.
1. Another tried-and-true that I constantly mention: Make Up Forever Ultra HD Invisible Cover Foundation. Medium to full coverage. This formula isn’t heavy on my skin; extremely lightweight and easy to blend. Little-to-no white cast. Also, this is one of the foundations in my collection that has the most spot on color match with my skin.
2. I was a bit hesitant to try this brand because no one really talked about it on social media. When I used to work at Ulta Beauty, a Fiona Stiles representative actually convinced a couple of my staff members (including myself) to not only try out the products but to purchase some as well (during this time of our training, the brand was on sale). I absolutely loved how smooth the Fiona Stiles Matte Finish Foundation Concentrate made my skin look. Since it is a concentrate, it does have a mouse-like consistency and is definitely my most full-coverage foundation out of the three favorites. With that being said, a little goes a long way for me. I also prefer to use this with a sponge. The finish isn’t completely matte - more of a satin finish if anything. Then again, maybe that’s because I prefer to apply with a sponge.
3. How can I not mention Fenty Beauty Pro Filt’r Soft Matte Foundation in my favorites? This is the first, and for now, the only product I have purchased from Rhianna’s line. I was going to wait on purchasing this foundation right away but a lot of my favorite beauty gurus I follow said nothing but good things. I’m glad I caved in and bought it. The first time I tried this on, I was just going out with some friends for a movie night. Applied this foundation a couple of hours before heading out just to see how it would wear. Caught a late movie and arrived home past midnight. As soon as I got home, I checked the mirror and oh my...I was so impressed with how it lasted - it still looked natural and felt lightweight. My oil was probably breaking through a bit at that point but not as bad. I was just obsessed and impressed with how my skin looked after many hours. This foundation became my go-to foundation for the rest of the year. As much as I tried to use a different foundation, I could not stay away from this. I prefer to use a brush for this foundation to get a fuller coverage, and then sometimes I go over the layer with a damp sponge after. I learned that tip from a Sephora associate at the mall and I can see why she does that extra step. This is such a great product that I decided to pack it in my traveling kit for some of my trips. The only thing I would critique about this product is the packaging: the cap feels flimsy so I’m always scared to pack it as is (I actually “repack” in it’s original packaging for my trips). I also don’t like how the pump gets dirty easily because it’s hard to clean sometimes.
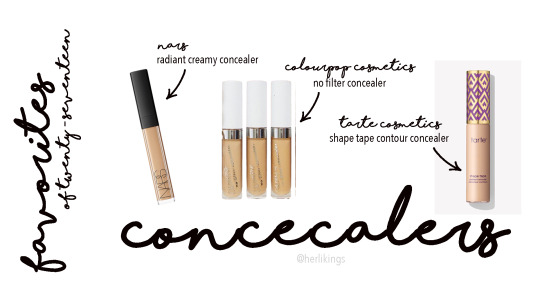
2017 was the year of I learned to be more appreciative of concealers.
1. My ultimate favorite concealer of the 2017 is the NARS Radiant Creamy Concealer. When Ulta Beauty finally started to sell NARS during my time of employment, I was so excited to try the concealer because that meant that I can 1) see what the hype was all about and 2) use my employee discount on it haha. I fell in love immediately. My favorite part about this concealer is that it blurs out the appearance of lines and wrinkles. When the NARS representative came in to give a short training, he mentioned light-diffusing technology, which helps give one’s complexion a radiant, natural look. It is also a medium-to-full, buildable coverage.
2. Colourpop Cosmetics continues to impress the beauty industry with their phenomenal products at affordable prices. Their No Filter Concealers are full-coverage, similar to Shape Tape (but has a thinner consistency) for a fraction of the price. First, I got shade Light 20 only because it was rumored to be a similar shade compared to my other concealers. When i first tried it out it appeared too light..much lighter than my Shape Tape. However, it looked perfectly fine once blended out with a sponge. Yes, maybe a tad bit lighter than what I’m used to but definitely usable. The next time I made a Colourpop purchase, I ordered shade Medium 30 hoping it would be a better fit. This shade works for me but for days when I do not want to put a full face on; it has enough coverage to blend in with my skin if I don’t put any foundation/base on. Blends seamlessly.
3. Last but not least, of course I had to include Tarte Cosmetics Shape Tape Contour Concealer. Full coverage. Better color match, in my opinion, compared to the shades Colourpop currently offers. Even though it’s a thicker consistency, it doesn’t feel too heavy or drying. A little goes a long way.
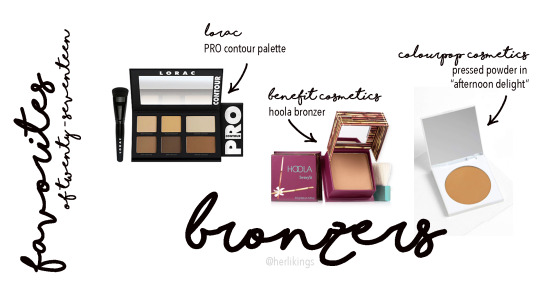
I tried numerous of bonzers this past year from undertones to formulas. These stuck out to me.
1. Tried-and-true my LORAC PRO Contour Palette. They did come out with a cream contour/conceal palette, but I still preferred their powdered version. I love this palette so much that I already hit pan on the banana powder and the large bonzer pan. Blends out easily. I always recommended this over the ABH contour palettes when I was working at Ulta Beauty.
2. Another tried-and-true: Benefit Hoola Bronzer. Can’t go wrong with this either. This has the perfect amount of neutral-gray undertones to provide a natural shadow in definition. Can also be used to contour.
3. When Colourpop released their pressed powder highlighters and bronzers, I was excited to try them. The highlighers are okay, but this Pressed Powder Bronzer in “Afternoon Delight” is impressive. It blends out so easily without leaving any streaks. This shade is perfect for my skintone - it’s warmer than the Hoola bonzer but not too orange or red.

I was totally obsessed with the glow this past year.
Disclaimer: I did not include any blush this year because I did not find one (other than the Amaretto in the BECCA split pan) that I gravitated to the most. I do have plenty of blush options, though.
1. The BECCA Cosmetics Split Pan Shimmering Duo in “Prosecco Pop/Amaretto” was ultimate my travel buddy of 2017. Brought this with me on most of my trips more than any other product. Prosecco Pop is a warm gold shade which allows it to pop without being too intense like it’s white gold sister, Champagne Pop. Amaretto is a beautiful blush - it’s not too brown to look like bronzer, but adds natural flush on the cheeks. Plus, having two products in one made packing a no brainer.
2. My initial thought when I swatched this highlighter was, “OH MY GOSH. Why didn’t I purchase this highlighter sooner?” Ofra Cosmetic’s Rodeo Drive is surprisingly, yet stunningly, so intense that you need to apply with a very, very light hand. One sweep across your cheekbones and you may blind someone. You should have seen my facial expression when I first applied it... *jaw dropper*
3. Colourpop’s Super Shock Highlight in “Wisp” is another one of my tried-and-true products, of course. This gold-champagne color and cream-to-powder formula adds a nice glow-from-within. Almost always packed this in my makeup bag when I traveled. Sometimes, I layer this under a powder highlighter to make my glow long-lasting and extra poppin’ throughout the day.
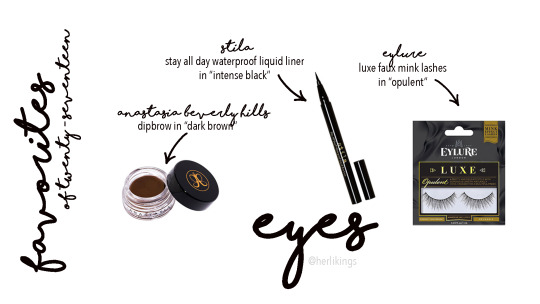
I didn’t know how else to name this category but it’s all related to the eye-area.
1. For the first time in a long time I did not mention my MAC Fluidline Brow Gel... I still love that product, though. The only reason I replaced it with the Anastasia Beverly Hills’ Dipbrow in “Dark Brown” is because this was my most used brow pomade of the year (mostly because I used the tester when at work). I started off with a darker shade to balance out my black hair I had going on earlier in the year, then switched to this as the black was fading out. A little goes a long way, but I still have to be careful with the amount of pressure I put on my hand + the amount of product on my brush during application.
2. I think I found my new favorite eyeliner. Caved in and tried Stila’s Stay All Day Waterproof Liquid Liner in “Intense Black” after recommending to Ulta Beauty shoppers. It is one of the best selling eyeliners at Ulta Beauty and my personal favorite compared to KVD’s. This eyeliner doesn’t smear and it glides on easily. The felt tip brush is flexible but doesn’t wear out. I’ve tried other liquid eyeliners similar to Stila’s but this forsure is still the best I’ve ever tried. Best believe I have a backup in my kit.
3. 2017 was the year I started to comfortably and causually wear false lashes. I loved Ardell’s Studio FX Wispie lashes until this Eylure Luxe Faux Mink Lashes in “Opulent” came into my life. It’s fluffy and soft; the band isn’t thick and is easy to work with. The first time I glued the pair on, I almost forgot I was wearing it. That is how light it felt.

A lot of brands released numerous of eyeshadow palettes all throughout 2017.
As mentioned earlier, I may not discuss all the breakthrough products of 2017, such as the Jaclyn Hill x Morphe palette or the Huda Beauty Desert Dusk. I do have both of the palettes but just haven’t touched them yet, or at least used them enough times.
1. Another tried-and-true to mention: Tarte Cosmetics Tartlette in Bloom. When I got this around the time of it’s release, I did not want to use any other palette. I wanted to mention this in this year’s favorites because it’s still one of the few products that works best on me over time. The amazonian clay formula is easy to diffuse without losing it’s pigmentation. It may have some fallout but I’m okay with it since it’s easy to blend out. The colors are great all year long. I recently got Tarte’s new Toasted palette but haven’t had time to play with it yet. I am certain that’ll be just as amazing as this Tartelette in Bloom.
2. Everyone’s favorite, Anastasia Beverly Hills Modern Renaissance. I think I mentioned in a previous post how much I absolute love the brand’s eyeshadow formulation - definitely one of my top favorite out there. This palette is clearly more bold in color scheme compared to the Tartelette in Bloom, but still flattering for different looks and on for different skintones. Created some of my favorite looks with this palette. A bit more fallout than Tarte and not as buttery, but smooth enough to work with. However, I think this has deeper color payoff than Tarte. In other words, it’s still worth it.
3. I kept debating whether or not I should purchase this palette but I’m so happy I caved in. This Urban Decay Naked Heat Palette is especially perfect for both summer and fall. The colors included can create both a warm, orange look or a deep plum smokey-eye. Probably the best set of formulation across the eyeshadow pans in the Naked palette series.

Last but not least, my favorite category...lipsticks. I own a lot already yet still continue to purchase more than necessary. I have a problem.
1. When I worked at Ulta Beauty, Nudestix was my go-to brand to upsell. Not only is the brand’s focus on easy-to-use products for people on-the-go, but it was also one of my favorite brands to personally use. These products are 1) perfect for busy people like me, 2) easy to pack (you can fit about 4 stix in one case, which also includes a mirror inside), and 3) almost most of the products are multi-purpose. When I had to get ready before operation hours I would run to the Nudestix fixture and create a look within 5 minutes. Guests constantly asked what I products I used on my face and later left with a couple Nudestix. My favorite lipstick they recently created is the Magnetic Matte Lip Color in “Boho.” When I had to set up the fixture and saw this color on the model, I knew I had to have it on my lips. It screamed “Coachella,” “90′s vibes,” and so much more to me. On my lips, it eventually feels a little bit more drying than expected but worth the color. It’s also long-lasting if properly moisturized beforehand.
2. Another nude to mention is the Kylie Cosmetic Lip Kit in “Dolce K.” I owned other shades before Dolce K but tend to gravitate to this shade more than the others. I barely use the lip liners (just because it’s easier to apply liquid lipstick when on-the-go), but the deep, beige nude color is a flattering nude on my complexion. I like the formulation of Kylie’s liquid lipsticks, too - long-lasting and not too heavy.
3. So here’s a funny story. When I moved back home and started to unpack my makeup collection, I found two unopened MAC Lipstick in “Whirl.” With that said, I keep one in my bag at all times no matter what. This dirty rose shade is one of my favorites because it’s not too pink nor too dark; it’s a great shade for some added color.
4. Jeffree Star Velour Liquid Lipstick in “Leo” has more of an orange undertone compared to the others, but it’s still a nude that works on me. According to the site, it’s “a true honey brown.” Pretty accurate. I purchased numerous of Jeffree Star liquid lipsticks all at once, but Leo is the only one that I tend to gravitate to the most. As much as I like Leo, I’m more of a Pisces (lol get it).
5. Last but not least, Kat Von D Everlasting Liquid Lipstick in “Bow n Arrow.” I love this shade so much. Probably the lightest nude I would and could actually wear. This fawn nude color is very neutral in tone, in my opinion. I tend to wear this when I have a dark, smokey eye.
AND THAT’S ABOUT IT.
That’s my take on my favorites from 2017, justified with my own personal experiences and opinions.
I wonder what will standout to me in 2018... Or maybe I should just use up everything I currently have in my kit... Only time will tell.
4 notes
·
View notes
Text
11 Tips and Tutorials: Makeup for Fair Skin and Freckles

Freckles are beautiful, but they will make makeup application rather confusing. If you've got fair skin and freckles, you've got a variety of options, whether you would like to spotlight your freckles, hide them, or conceal specific areas. We’re all for showing off your freckles and making them pop, but we also know there could also be times once you want to hide them up. Whatever you select, we have the ideas and tutorials for you! inspect our go-to guide makeup for fair skin and freckles!
Tips and Products for Fair Skinned Gals
1. Concealer is vital
Fair skin tends to point out blemishes and redness far more than darker skin does. Invest during a concealer that’s high coverage, creamy and non-drying so it doesn’t make your skin look cakey. you'll use it to hide your under-eye bags also as pesky red spots!
2. Blush > Bronzer Sometimes bronzer can look too caked on when you’re pale. Instead, a baby pink blush will offer you a momentary glow and subtle flush. Blush makes your skin look healthier and more natural than a bronzer will! bronzer and shades aside from baby pink can make your skin look orangey.
3. Always Wear Sunscreen Everyone should wear sunscreen every day, but it’s especially important if you’re a good skinned gal. attempt to keep your skin out of the sun the maximum amount as possible, but if you are doing leave within the sun, confirm to wear sunscreen with SPF of 30 or more (even within the winter!).
4. Beat Blotchiness Blotchiness is often a significant pain for women with fair skin. Use a redness corrector cream to banish blotchy skin and make a smooth, flawless foundation to use the remainder of your makeup!
5. Try Switching to Brown Mascara and Eyeliner Black mascara and eyeliner tend to seem harsh on super pale skin. Try switching to a dark brown shade for a more subtle, natural look. They’ll still highlight your eyes and can blend in far better together with your skin tone than black will.
Tips to reinforce Freckles
6. Choose a Sheer Foundation or Tinted Moisturizer
If you would like to point out off your freckles, choose a foundation that makes a sheer veil over the skin. A sheer foundation, BB cream, or tinted moisturizer will typically work best for this! Any product with an excessive amount of opacity will make your freckles look muddy or hide them altogether.
7. Use a Cream Highlighter Highlighter works beautifully on freckled skin. additionally, to employing a tinted moisturizer, add a luminous cream highlighter like Fenty’s Shimmer Skinstick to form your skin appear as if it’s glowing from the within out! The light-as-air shimmer formula allows you to spotlight your cheekbone to offer your skin a youthful look while letting your freckles shine through.
8. Use a Brow Pencil to Deepen Your Freckles If your freckles start to fade during winter, or if you would like your freckles to be more pronounced any time of year, use a brow pencil like Anastasia Brow Wiz to lightly deepen your freckles. it'll offer you a natural, sun-kissed look all year round!
Tips to cover Freckles
9. Use a color Corrector Before Foundation Using foundation over freckles that haven’t been color corrected usually doesn’t look so great. A color-correcting primer will help neutralize the colors, also as prep your skin for subsequent makeup steps. If your freckles are more reddish, use a green-hued corrector; if they’re more purplish, choose a yellow-hued corrector. The Stila Correct & Perfect beat One Colour Correcting Palette is amazing!
10. Use Coverage Products That Match Your Skin’s Undertone Make sure to select coverage products that match your skin’s undertone, instead of the undertone of your freckles. Use the color of your neck and chest to work out the simplest concealer and foundation shades for your skin!
11. Use Smaller Brushes for Concealer If you would like to urge precise coverage of your freckles, confirm to use a little tapered blending brush. you'll target specific areas and make the coverage you desire! you'll also use the tip of a Beautyblender to urge an equivalent effect.
0 notes
Text
Makeup Lines
Shopping for makeup is tricky. Trends are constantly changing, your complexion and undertones need to be taken into account, and formulas don't always live up to their claims. That, and there are about one million choices in every makeup aisle or online retailer.
PROFESSIONAL MAKEUP LINE
MAC
During his time as a photographer and makeup artist, co-founder Frank Toskan realized the lack of suitable colours and textures needed to maximize performance and result of makeup for these industries. Further, he realized how limited conventional products in the cosmetic industry were to responding to the needs of the modern woman. For the first time ethnicity in makeup was addressed. Toskan began to craft a niche market in the world of makeup. Family joined forces including brother-in-law and chemist Victor Casale. The Franks created the brand that was “by makeup artists for makeup artists.” They were also well known for creating many vivid and rich colours, for every skin tone, focusing on darker skin tones. MAC very quickly cultivated a following in both the fashion and the retail markets, and was responsible for creating many trends. Initially sold exclusively at the BAY in Canada it quickly expanded to Henri Bendel in New York. Nordstrom department stores welcomed the brand soon after marking MAC's first foray into the mass North American retail market Saks, Macy's, Dillard's, and Bloomingdale's rapidly followed suit as well as dozens of MAC owned stand alone stores. Unsolicited celebrity endorsement was key to MAC's success as Madonna, Mariah Carey, Princess Diana, Linda Evangelista, Naomi Campbell, Cher, and Janet Jackson embraced this new world of makeup art. MAC continues to be the leader in creative cosmetic innovation worldwide.
The company's products were originally intended for makeup professionals, but are sold directly to consumers worldwide. Frank Toskan stated that he "first manufactured makeup for models, but then the models wanted this makeup for their sisters, friends, and so on... ". Today, the brand continues to work with in fashion show professionals: "From a niche brand [mainly for photo or film], MAC has become a global brand.
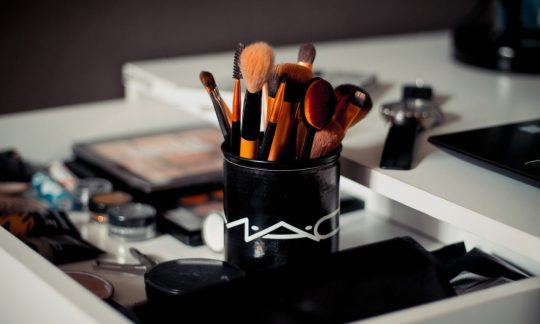
Apparently the most expensive makeup product of MAC is the mineralize skin finish with a value of $40 CAD
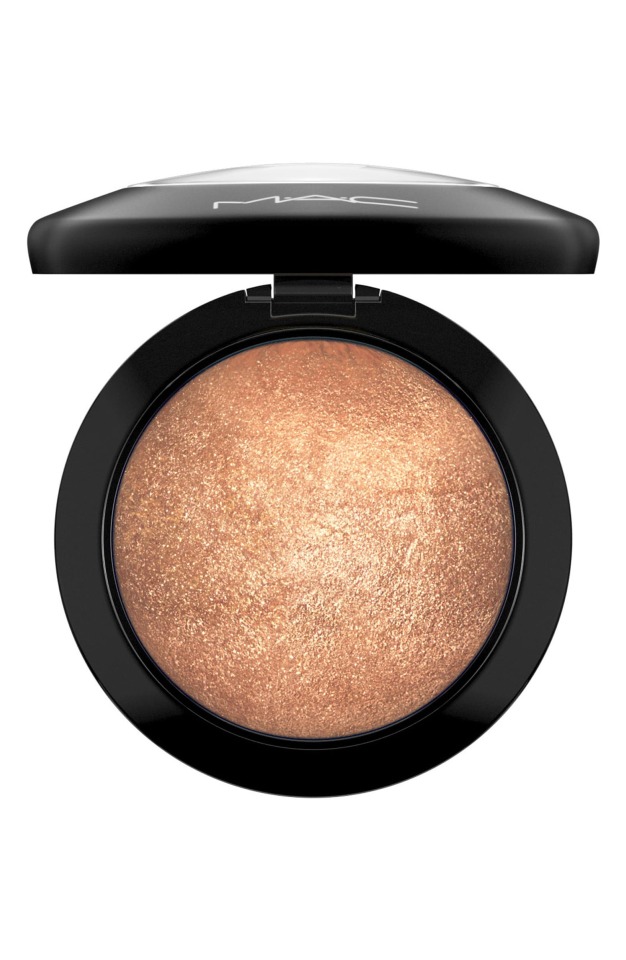
and the less expensive product is the mini lipstick with a value of $14 CAD
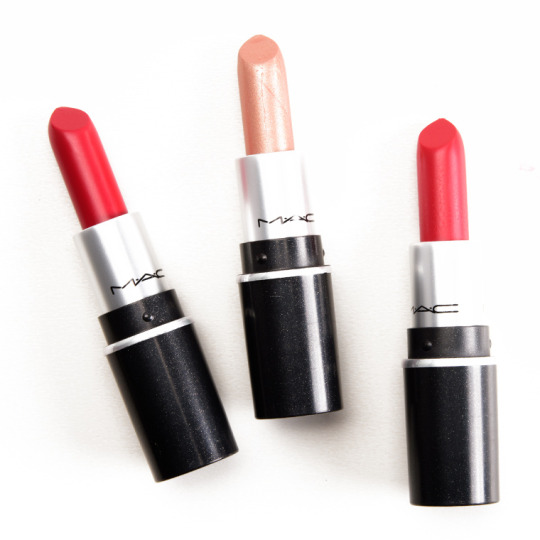
ORGANIC/NATURAL/MINERAL MAKEUP LINE
RMS BEAUTY
Time to talk about organic makeup brands! A topic we’re passionate about, along with many to-be brides.
Consumers are becoming more picky when it comes to what’s in their beauty products — and that’s a great thing! Natural, organic and cruelty-free ingredients are at the top of the must-have list. Whatsmore, brands arebeing called out for ingredients or practises that are less than ethical.
Historically, organic or natural beauty brands left a lot to be desired in terms of pigmentation, performance, durability and texture. Thanks to great technology, super smart people, and high demand, we’re seeing some of THE most incredible makeup brands that happen to be organic and high performing.
If you’re on the hunt for some new makeup for your big day, go organic! In fact, some of the best, most beautiful makeup brands on the market are organic. They have a focus on fresh, healthy, glowing skin as well as incredible color and texture. Below are a few aspects that make for a great organic makeup brand:
Each company generally has a responsible, ethical, and caring attitude toward the planet, employees, and customers
Ingredients are generally good for the skin, providing nourishment as well as aesthetic beauty. A mixture of skincare and makeup.
Packaging is generally made from sustainable, recyclable materials.
Rest easy knowing that nasty or harmful chemicals aren’t applied to your skin in the name of beauty.
RMS BEAUTY
RMS is an incredible brand that use ingredients which aren’t refined, bleached, or deodorized. They use concentrated pigments from clean and healthy color sources. That means you only need a small amount for maximum effect. This is fantastic if you prefer a lighter hand with your makeup and would rather use the minimal amount of product on the face for a fresh and light feel.
RMS is a brand for brides who want a light, luminous and healthy makeup look that makes their skin a key feature of the look.
Packaging – Made from glass and 80% post-consumer recycled fiber; manufactured using 100% wind power
Key Ingredients – Coconut oil, vitamin E, jojoba seed oil, and shea butter
Living Luminizer
One of RMS’s most well loved products is the cult cream “Living Luminizer”. It provides a dewy, natural glow to the skin without glitter or pore-magnifying textures. Use on the high points of the cheeks, the ridge of the nose, the brow bone, temples and cupid’s bow to catch the light without looking like a frosted Christmas decoration!
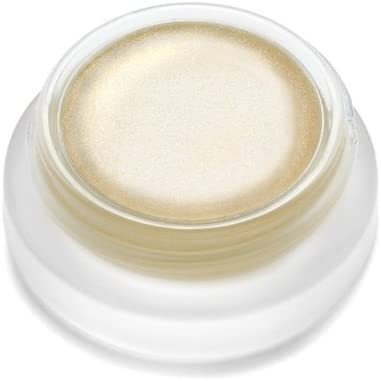
This set includes an Uncover-Up, (another RMS cult classic, a lightweight, hydrating and natural-finish concealer), a Living Luminizer, a mascara (volumizing or defining) and an Un-Powder (translucent or tinted) for a soft, satiny finish. Super minimal brides could complete most of their look with these four products, adding a little cheek and lip color, and perhaps a little warmth through the eye with a bronzer. All four of these products are versatile, staple items to use long after the wedding day. The natural-bride’s perfect set.
RETAIL MAKEUP LINE
We’re living in a golden age of drugstore beauty. Where we once had to sacrifice efficacy for affordability, that isn’t the case with the best drugstore makeup now. Quality is on the up-and-up, you can find products in any and every color, and it’s easy to stock up when the need for a serious smoky eye strikes. And there’s no reason not to when good value is right down the street. No splurge, no buyer’s remorse, no problem.
To narrow down this year’s Glamour Beauty Award winners, our editors and a panel of industry experts looked at every new blush, concealer, mascara, and lipstick, and made some tough calls—which turned into this list of the very best drugstore makeup products.
All products featured on Glamour are independently selected by our editors. However, when you buy something through our retail links, we may earn an affiliate commission.
The Best Foundation
Foremost, I love that this product is free of oils, parabens, phthalates, synthetic dyes, and harsh fragrances, because I have sensitive skin. It has great medium coverage that stays on all day and doesn't require touchups. Another major key is the anti-blue-light ingredients, because I'm either on my phone or sitting in front of my laptop most of the time. —Ellen V Lora, beauty, fashion, and lifestyle blogger. $10.99
The Best Concealer
I can’t help but clap it up for this multifunctional concealer. The cushiony yet lightweight texture seamlessly mimics real skin and works beautifully on your entire face. The full-coverage formula—available in 30 shades—erases dark circles, brightens dull skin, and sculpts the best cheekbones of your life. —Felicia Walker Benson, beauty expert. $11.99
THE BEST PRIMER
This water-based primer serum is great for anyone who has more oily skin and needs their makeup to last all day. Apply it right after your moisturizer, and let it set for two minutes before applying your foundation. —Daniel Martin, celebrity makeup artist. $14.97
I personally think doing all this research, it has helped me a lot to have a better understanding about the main characteristics of makeup products, history, what are they made from, pros and cons of each one.
There are so many classification of make up. How to know which one to pick up? Retail makeup line, professional line or mineral/natura/lorganic line. This choice is going to be regarding what are you looking for? Any choice you do is right as long as suits your skin needs, Also, how much are you willing to spend?
It is important to know the ingredients of your makeup products that you are going to wear to avoid those that contains the highest toxic substances and prevent a premature aged skin, keeping it fresh and smooth.
At the same time, you should know what type of skin (dry, normal, oily, combination) or skin condition (eczema, psoriasis, acne, rosacea, vitiligo etc.) you have , knowing this it would be easier to choose your favorite make up products and that way I am pretty sure you will love do you makeup.
Edgar Castillo
0 notes
Photo

Title: GRWM: Date Night in Hawaii Involved: Mia Carter Posted: Thursday, April 2nd, 2020 Subscribers: 2,450 Views: 7,908 Likes: 345 Dislikes: 3 Video #: 3 Comments: 3,567 Description Box:
Get ready with me for a date night with the hubby while we are Spring Breaking in Hawaii!
Watch: https://miachanelparker.tumblr.com/post/611602148480942080/title-intro-to-baby-carter-and-mommy-mcvlogs
Instagram: @mrscarter_ Twitter: @mrscarter_ Facebook: Mia Carter Snapchat: @mrscarter_
FAQ:
How old are you? 21 How old is your husband? 24 How long have you been married? 1 month How far along are you? 12 weeks Where do you study? University of Houston Where do you live? Houston, Texas
Mia set the camera up in the vanity area of the villa and she smirked at it as she gathered her makeup things and placed them before herself. “Hey guys” she said leaning down into her makeup trunk and pulling out some brushes. “I decided to record a get ready with me while we are here in Hawaii” she said to the camera excitedly. “We came for spring break and our best friends are here with us. We are going to go on a little date night” she smirked as she began the process of filling in her eyebrows on camera. “If you guys didn’t know, my best friend is pregnant as well. So, this little trip has kind of became a little eyeopener” she told him, using the angled brush delicately as she leaned in to sculpt her brows before filling them in once more. “This may be one of few times we can all hang out and vacation together considering we will be new parents and that would get some getting used to” she told him. “So it’s a little me sentimental for me” she chuckled a little as she moved to the other eyebrow.

Mia licked her lips gently before she sat the brush down and she grabbed some Chapstick and rubbed it across her dry lips. She capped it when she was done, putting it back down before she grabbed the brush once more and finished her brow. Mia rubbed her lips together content with their being some moisturizer on them now “anyhow, I just thought it was kind of cool that we get to get a little couples time in and stuff still. My best friend is closer to giving birth than I am. She’s due in July” she told the camera “so this is really like her last big travel” she told them as she moved to grab her concealer and concealer brush. She begins to clean up her eyebrows, both above and below them, sculpting the brow even more on her face. “Hawaii has been amazing so far, I love it here” she told them “I am an island girl” she told them truthfully “I am Haitian” she confessed to them “so I absolutely love islands” she said in creole smoothly before she smirked. She began to massage the concealer into her skin, blending it out. “I think I have fallen in love with Hawaii more than I fell in love Paris” she said to them.

“Although, Paris will forever have a special place in my heart because that is where I married my husband. I just love a good tropical vibe” she told them. “What places have you guys traveled and just fell in love with instantly?” she asked him “you have to drop them below I am curious” she told him softly. When she was done with her brows Mia moved to grab some primer that she loved and she showed it to the camera “if you aren’t on that Fenty Beauty, then what the heck are you on?” she asked him as she pumped the primer into her hand twice and moved to smooth it out over her skin, working it in gently. “And before anyone comments below I have done my full morning beauty routine already, including SPF. Listen people, melanin does not exclude you from the SPF crew, put SPF on people” she told them giving them a knowing look. “It is important, and you should wear it for at least like 10 minutes or so before walking out the door I think they say. So, I put it on during my morning routine” she told them all as she grabbed her brush and Mia began to blend foundation into her skin.

“I also use the Fenty foundation as well” she told them happily as she continued to work the foundation into her skin. “So, in regard to the baby” she said getting on the topic most people were here for. “I had like a very awkward episode the other day while here. Well really our first night here” she said looking at herself in the mirror before she moved to work the foundation down her neck with the brush. “My ankles swelled, and I was very, very confused. I don’t know why it happened, I googled it and just came to the conclusion maybe being on the plane for as long as I was did it, maybe I ate something with too much sodium beforehand, you know” she said with a shrug. “But it made me put a few things into prospective” she told them all. “Every woman is different, and I think I have spent a lot of time comparing myself to my best friend and in the midst, I am neglecting what my body is telling me” she said pointing to herself in with her brush. “It kind of shook my husband and I up a bit, so I definitely don’t want that to happen again. Not where I am in the pregnancy” she said softly.

Mia sat the foundation brush down and she moved to grab her concealer that is lighter than the one she used on her brows. She placed it under her eyes, center of her forehead, her chin, down her nose, and above her lip. “So now I know I really need to monitor what I consume” she said to them easily before she closed the concealer and grabbed another one that’s a darker shade than her foundation for her contour. She placed it around her hairline, she chiseled her cheeks, and drew a line against her jawline. At the last minute before she closed the top, she lined the side of her nose, covering the outer unhighlighted region before she picked up her damp beauty blender and began to work “this is damp by the way” she told them idly.

She pounced the sponge across her face, and she blended the creams out evenly as she said “so I think when we get back to Texas, I am going to do a little research and get a healthier diet going. I don’t eat bad, but I don’t eat 100% good either” she told them. Mia blended out all of her highlighted areas before she pinched the sponge and began to blend out the portion on her nose. After her nose came the contouring, she used the same sponge to blend out the dark areas of her face, making sure she blended upwards in her cheek area. When she was done blending out everything on her face, she moved to sit the sponge down and she grabbed a brush, moving to set each highlight area with a translucent powder and then each dark section with a tinted powder. She set her face fully and she licked her lips slowly before she looked herself over in the mirror and she grabbed a bronzer swirling a brush over her cheek area.

Mia leaned down and grabbed a highlighter, a blush, and some eyelid primer and she sat them in front of herself. She too grabbed an eyeshadow palette, some lashes, her eyeliner, mascara, lipliner, and liquid lipstick. “I was not going to do an eye look, but I love wearing lashes and liner” she told them, “so that is what I am going to do” she breathed. Mia added some more powder under the bottom of her eyes incase any shadow color fell down. Once she did that, she moved to placed powder under her cheeks chiseling them out to make her face appeal slimmer. Mia began to use some eyeshadow brushes and she began to work them into her lid blending color out smoothly.

“I actually have no clue what I am wearing today, so I have no clue why I just went along with this color” she said to camera as she continued to blend out the color easily. She licked her lips again before she stopped to apply more Chapstick to her lips, she sat it back down and she picked her brush back up. Mia worked within her eyes crease before she moved to the other eye to blend some color out there as well. “I don’t even know if I have anything this color” she breathed softly when she was done blending, she moved to stand up from the seat, holding her robe closed as she walked away towards their clothes.

After a moment, she moved towards her makeup setup and she sighed “I think I have something that I can wear that will work with the look” she told the cameras she continued to work on her eyelids. The most important part about a makeup look as a whole is the blending of it all, so Mia always seemed to take her time with her eyelids. She picked up another brush blending out another color on her eyes, fusing the two and she licked her lips while she did it, tongue pressed against her top lip. Mia watched as Tyler walked past her in the background with nothing, but a towel wrapped around his waist. She eyed him for a moment before she moved to the other eye and began to blend that side out like she’d done the other eye. “What color are you wearing?” Mia called out to him curiously.

Tyler walked out of the bathroom, his body still dripping a bit as he wrapped the towel around his bare waist. He moved for the closet, licking his lips at Mia’s question. “Uh,” he shrugged a bit. “I’m not sure yet,” he told her truthfully. “I’m thinking maybe blue or green,” he shrugged.

Mia nodded her head as she sprayed a flat brush with some setting spray and dabbed some foiled shadow swiping it across her lid. “Okay” she breathed as she built the color up on his eyelid and moved to her other eye, doing to it what she did to the other eye. She shifted in the chair and adjusted her robe a bit as moved to the other eye doing the exact same to it. Once she was done with that, she grabbed her eyeliner and shook it up before she unscrewed the liner and begin to draw out wings of both sides of her eye easily. She had practiced liner long enough to do it easily and without much thought or mistakes. Licking her lips, she sat the liner aside as she moved to open her lashes looking at the camera “these are the Lilly Lashes, Miami style” she said showing them the case before she squeezed some glue onto both strips.

She sat the lashes aside letting them dry down a little as picked up a big foundation brush swiping away the extra powder that rested on her face. After, she grabbed her MAC fix plus setting spray, and she drenched herself with it knocking off the powder residue and melting down everything. Mia found a piece of paper close by and begin fanning her face a little drying the spray down, her eyes closed as she did. Mia sat the paper aside and she grabbed her eyelash curler, curling both eyes before she moved to apply her lashes on both eyes gently, using a steady hand. Once they were on Mia pushed them up a bit, setting them exactly where she wanted them to be and she looked herself over coming alive before the camera. “I love these lashes” she said admiring them fully turning her head as she tossed some braids over her shoulder.

Mia picked up her mascara and begin to apply it to the lashes, fussing hers and the strips together as she rubbed her lips together. She also applied some to her bottom lashes, before she closed the mascara tube and said “oh” to camera lens. “I started looking into different birthing methods online, and on Youtube” she told them. “I am just curious to know the possibilities that we have and what people think, I know sooner or later my husband and I have to complete a birthing plan” she told them. “And I am just trying to stay one step ahead of everything for the baby” she breathed out softly as Tyler moved around in the background. Mia picked up a brush and she grabbed her phone opening up her pregnancy app and she showed the visuals of what their child looked like currently “here we are right now” she said showing them before she sat the phone down. “We are very close to our second trimester; I am so happy. I feel like time is moving so fast which isn’t a bad thing” she emphasized. “Because I am super excited to know the gender of the baby, I can’t wait for the baby shower experience, and you guys don’t know how ready I am to hold my little baby in my arms” she breathed out with a wide grin on her face. She dipped her fan brush in her highlighter, and she brushed it onto all the high points of her face as she normally did. “I think this is NARS orgasm” she told them.

“And considering that I will be entering my second trimester I decided that I will look into more avenues in relation to my pregnant. Like some classes and birthing options and stuff” she told them with a shrug. Mia picked up her brown colored lip liner and she begin to line her lips, over lining her top lip a bit to make them appear bigger than what they were. It was something she did that she didn’t truly admit but it was a fact of her routine, she made sure she filled the inside of her lip a bit before she picked up her nude liquid lipstick. She opened the tube and applied the lipstick over her lips, and she rubbed up them together blending the two colors together on her lips and she sat back looking herself over.

All dressed and ready, Tyler walked into the room, looking at Mia and he smirked. Walking over to her he said, “Aaron and I are ready but take your time,” in a whisper. “Nova is still getting ready too,” he walked a bit closer, leaning in to press a kiss to her forehead. “You look beautiful babe,” he said easily.

Mia looked up at Tyler as he spoke and she nodded her head, shifting in her robe, she smirked. “Okay, I think I’m done” she told him softly as he leaned down to kiss her forehead, she smiled softly closing her eyes. She opened them and said “thank you baby” puckering her lips for him to kiss despite her lipstick, it dried down matte it wouldn’t transfer anyhow.

Tyler smiled at Mia as she said she was done, and he nodded. As she puckered her lips at him, he reached down, gripping her cheeks as he leaned in once more, kissing her lovingly. “You’re welcome,” he whispered against her lips.

Mia smirked as he reached down gripping her cheeks and kissing her lips, she moaned in it softly before he let her go and she nodded her head. She slyly caressed his rock-hard abs through his shirt before he walked away, and Mia moved to spray her face fully one last time before she looked to the camera. “Okay, so I am going to get dressed and I’ll be right back” she said to them.


“Okay” Mia said softly sitting before the camera once more “I am all dressed up and everyone is ready to go” she commented. She stood up and said “this is what I am wearing” she said showing the flowy dress to, she even picked up her mini Chanel bag to show them before she sat it back down. Sitting before the camera once more afterwards Mia said, “This is the makeup look” zooming in a bit “I think I did pretty damn well getting an outfit to match this” she chuckled lightly. “As always you guys” she said clasping her hands together. “Thank you for watching” she said to them happily “don’t forget to like, comment, subscribe, and click that little bell to be notified every time we post a new video” she said to them. “There are Carter cuties down below that can contest to us being hella stupid lit over here and I know you want to join the team boo” she said with a chuckle. “And after you do all those things go ahead and watch this video” she said shifting in the direction of where the last video will sit on the screen. “Go ahead” she said as the video ends.

0 notes
Text
Hello Beauty Babes, HAPPY 2018!!!!!
Before getting into it, I wanted to wish you all a freaking amazing year that is full of accomplishments and blessings. I wrote you guys a very special message but it was a bit personal, so I decided to put it at the end of this post. so if you want, you can check it out!
Buuut for now, let’s get into some makeup!
This year has been full of new makeup. Some were good, some were bad, some were returned, but the very few have been chosen for my 2017 favorites!
Favorite Primer – NYX Hydratouch Oil Primer ($13.99)
It’s funny to think that I used to not even be that into primer & now I never go without it.
NYX HydraTouch Oil Primer is unlike any other primer I own. I never thought that using an oil primer would be so beneficial. When I saw it on the NYX website, I thought it was a great affordable dupe for the Smashbox Oil Primer. But seriously, this primer is way more than a dupe. it’s amazing all it’s own. It doesn’t feel greasy, or separate your foundation. It gives your skin and makeup a natural, glowing from within look.
Even when I use other primers, I still use a few drops of this in the foundation I’m wearing to give it an extra boost of glow.
Favorite Foundation – L’oreal Infallible ProGlow ($11.99)/ Maybelline Fit Me Matte&Poreless ($5.99)
I couldn’t choose between these two, so I’ve called a tie.
Loreal ProGlow is a Normal/Dry girl’s dream. It has medium coverage, but it doesn’t feel too heavy on the skin and gives your skin a naturally glowing from within look. I recently repurchased this and have worn it for most of fall/winter.
Maybelline Fit Me Matte&Poreless really suprised me. I thought that because it was matte I wouldn’t like it, but it has the perfect combination of factors that works with my skin, but also gives the benefits of a matte foundation like a flawless finish, long lasting, poreless appearance, etc. I also bought another bottle of this this year and ever since, I haven’t moved it from my vanity. Also, it’s one of the least expensive foundations I own at $5.99 but it performs better than some of my more expensive ones!
Favorite Powder – Maybelline Fit Me Loose Finishing Powder ($4.99)
When I heard that the Fit Me line was coming out with a loose powder, I was SOOO HYPE! And it did NOT dissapoint! This powder has such a nice consistency. It sets the under eye area amazingly. And because it’s tinted, I also wear this as an all over powder. It locks in makeup so well, I’ve reached for this numerous times this year!
Favorite Concealer – Wet N Wild Photofocus Concealer ($3.99)
I don’t know how else to describe this other than saying it’s bomb af.
It just works! I can’t explain it! It’s just really good, and it blends out flawlessly and doesn’t crease alot, and it has great coverage. This concealer is less than $5 but it works like a high quality product. I have two tubes of this so that I always have some at the ready.
Favorite Contour Product – Fenty MatchStix in Truffle ($25)
I’m Not gonna lie, I did buy the matchstix trio ($54) this came in because it was named after my dog, truffles. But now, it’s my go to contour product. It’s such a gorgeous brown color that looks great with my skintone. It’s not too cool, but not too warm either so it chisels out your cheeks without looking harsh. It blends out like a cream very effortlessly, but it sets into a powder and lasts for hours.
Favorite Bronzer – Iman Luminous Foundation Powder in Earth 2 ($9.69-$13)
I know this doesn’t advertise as a bronzer, but that’s how I use it and it’s my favorite bronzer this year sooo yeah.
I got this on sale at Walgreens and had no idea I would use it so much. it’s such a great bronzer shade and it has some slight gold reflect that gives your face such an amazing natural looking glow and warmth, it’s awesome. I also have another Iman Foundation Powder in a Matte finish in Earth 6 that’s also really nice, but this one has been on my makeup stand for months and I’ve used it consistently.
I’m not sure the retail price because I got mixed results, so I’m not totally sure the price, but it’s around $10-15. You can get it at Target.
Favorite Blush- Sephora Collection Blush -Hot Flush($14)/ Milani Baked Blush – Luminoso ($9.49)
Another Tie! (sorry, i’m very indecisive)
Hot Flush from Sephora Collection is just such a unique blush color. I still have not seen a blush that looks like this. It’s like the color of cheetos but with this beautiful warm golden sheen. It looks so amazing on the cheeks. It’s like nothing I own, and in 2017 I used this all the damn time
Milani Luminoso is just…I mean come on! It’s freakin’ Luminoso! Soo many beauty gurus love this and now I know why. It looks good all the time, on all skin tones, with any makeup look, etc. It makes your cheeks look absolutely amazeballs.
Favorite Highlighter – Girlactick Luminous Face Veil in See Through & Lustre
You guys know I LOVE highlighter and I have alot. You would think this would be a hard category to choose for me, but it really wasn’t. Because I knew that these highlighters dominated 2017.
Girlactik Luminous Face Veil was MY JAM! It not only looks blinding and like you can be seen from space while still somehow looking natural. It just melts into the skin! And, it lasts on your face all day. Lustre is a gorgeous pink toned highlighter and See through has a stunning gold champagne tone. This year I would switch back and forth depending on what my eye look was. If I was wearing a pink or cool toned look, I would grab Lustre. and for warmer looks, I’d grab See through. I did obviously wear other highlighters, but these two were one of my favorite purchases of 2017.
Honorable Mention: Maybelline Master Chrome ($7.99)
This highlighter is not only drugstore, but it is the perfect gold shade for highlighting your cheekbones AND it has a great formula! The glow is real, and I had to give it a shoutout because I reached for this all year long!
Favorite Eyebrow Product – NYX 3in1 Brow Pencil ($12.99)
I’ve never seen a brow product do so much in one. You have a pencil, powder, and gel all in one matching shade, all in one pencil. And all the products are actually great! The brow pencil is pigmented and long lasting, The powder sets in all the right places, and the gel is hella pigmented and keeps your brows in place all day! This idea is so unique and revolutionary. I was a bit shocked at the price, but after using it, you literally are getting 3 products in one, so it really is worth it.
Favorite Eyeliner – NYX Epic Ink Liner ($7.99)
Don’t be mad at all the NYX. you guys know I love NYX!
I never had an eyeliner that was a holy grail. I kind of just would pick out a liner at Target and hope for the best, but now, I need to have NYX epic ink liner in my life. It’s hella pigmented, the felt tip applicator is pointed, and you get the perfect winged liner that lasts all day and doesn’t budge! You can check all my Instagram (@SageSlays_) video tutorials, and 99% of the time, Nyx Epic Ink Liner is what I’m using!
Favorite Mascara – Maybelline Colossal Big Shot Mascara ($5.59)
I wasn’t going to do a favorite mascara, because I really have a #1 mascara in my collection I just kind of have my favorites, you know? But I realized when I was picking the products for this post that I used this mascara for most of the year.
It was my go to this year. It just works so well, it gives me volume, and length, it doesn’t make my lashes feel stiff or look clumpy. And I don’t wear false lashes, so I need my mascara to be POPPIN’ and this mascara, is poppin’.
Favorite Eyeshadow Palette – Morphe 39A ($32) / NYX In Your Element Palettes ($30)
You guys, I have alot of palettes. Palettes are like one of my favorite products to buy so this was really hard to pick. And even so, I had to pick two for a tie.
Morphe 39A is a palette I haven’t had as long, probably a month or so, BUT ever since I got it, I have used it so much. I’ve created two videos using this palette on IG, and I’ve used it everyday as well. You get 7 big pans for transition colors for all different skin tones, and you get shadows in a variety of colors so you can really get creative. Not to mention the formula is awesome, they’re blendable and pigmented.
NYX In Your Element Palettes were a big favorite of mine in 2017. NYX totally stepped it up. These shadows are super pigmented and easy to blend out, and you can create so many looks with the colors in these palettes. I wasn’t a big fan of the hiked up price ($30!!!) but I do feel like you get your money’s worth. The quality of these shadows is up to par with high end palettes.
Honorary Mention: Lime Crime Venus II Palette ($34)
The Venus II palette is such a unique palette. The shades are one of a kind, and thats why I use it so much. My favorite most used shade from this palette is Mustard and it is the perfect mustard shade. I use it in so many looks to get that warm mustard tone in an eye look. But the palette all together is very useful. Jam and Mud are two shades that I can use on a daily basis and pretty much all the shades are well loved.
Favorite Lip Liner – Sephora Collection Rouge Gel Lip Liner in Monarch ($11)
I don’t use lip liner all the time, but this lip liner was a HUGE favorite in 2017.
The sephora rouge gel lip liners as a whole are amazing, the formula is so unique. it’s not hard or stiff, and it feels so luxurious on the lips.
This shade Monarch however I literally took with me everywhere. It just looks good with pretty much any nude shade. I wore this sooo many times by itself, under a gloss, with a lipstick, etc. it’s such a diverse lip liner and is absolutely a holy grail product. I keep it in my makeup bag so that I always have it with me on the go.
Favorite Lipstick – H&M Beauty Lipstick in Biscotti ($9.99)
I’ve never tried anything from H&M beauty, but this lipstick is awesome saucesome. It is the nudest nude i’ve ever seen. It’s like concealer nude, but it looks good. The undertones in it are not at all pink (which I love) and it works well with so many nude shades. I like to use it sometimes on top of deeper nude shades to lighten them. But my favorite way to wear this is with the sephora liner in monarch.
Honarary Mention: Revlon Lipstick in Sandalwood Beige ($4.99)
This lipstick is such a gorgeous warm nude. I reached for this alot in 2017 because the color was so stunning, and the lipstick formula was fabulous.
Favorite Lip Gloss – Colourpop Ultra Glossy Lip in My Jam & Cabana Boy ($6 each)
I love lip gloss, I swear it’s making a comeback you guys. But this year, my go to lip gloss was the Colourpop Ultra Glossy Lip in My Jam & Cabana Boy.
Now I know these are two glosses, but they’re so freaking similar. same formula, same metallic finish, etc. But Cabana Boy is more rose gold while My Jam is a gold shade. These look so gorgeous on their own, but they also pair well on top of other lip colors and give them a nice metallic glossy finish. If i’m ever unsure of what lip to where I throw one of these in my makeup bag.
Favorite Miscellaneous Product – NYX Glitter Glue ($5.99)
I wanted to include this product because I’ve literally used it in 99% of my makeup looks this year. pigments, glitters, metallic shadows, I ALWAYS use the Nyx Glitter Glue. It keeps my shadows in place, and it also intensifies the shadow so it really stands out. I even keep a tube of this in my makeup bag so that I always have some on hand! I had to give this product a shoutout because it was well used in 2017.
Favorite Beauty Sponge: Mikasa Beauty Lemon Drop Sponge ($8.25 with code SAGCATHERINE25)
Courtesy of Google.com
I had to mention my Mikasa Beauty Lemon Drop sponge. I was so happy to have Mikasa Beauty reach out to me to become their affiliate. One of the products I tried was this sponge and I’ve used it ever since! It is sooo soft, it blends makeup out flawlessly, and I just love it. This retails for $11, but you can use my code SAGCATHERINE25 to get 25% off of your purchase!
Alright you guys! These are all my favorite products of 2017! What a year of makeup. I’m so hype to try out all the new makeup coming our way and to keep posting about it.
I want to say how blessed I am to have my beauty babes. You guys, the people who share my love for makeup and read my blog and watch my Instagram, you guys make me feel great. I love our little community and I love being able to thrive in it in my own unique way. The beginning of this year was very melancholy for me. to be honest I didn’t really believe I was capable of anything. I was kind of stuck. I spent a lot of time alone not progressing and wishing for a change. I was not only depressed, but was letting my emotions affect my physical health and sickle cell disease and got very sick as well. I don’t mean to make this a long ass sob story, I just wanted to really share so that you realize how much getting to this point means to me. I feel so blessed to be at this point in my life. I still have a lot I need to tackle and deal with, but unlike last year, I now know that I am capable of doing what I set out to. I know some may not think makeup is valuable, but it’s about expressing yourself and showing the world a different side of you every single day. and to anyone that hopefully is a reader of my blog that ever feels incompetent or alone, just keep going. You are EXACTLY where you need to be at this point in your life.
Success is Defined by your Willingness to Keep Going.
Keep up with me in 2018 on social media
Instagram: @SageSlays_ Snapchat: @SageCatherineXO
I love you beauty babes!
Stay Fierce, & Stay Ready for the new year!
XOXO, Sage Slays
Sage Slay’s 2017 Favorites!!! ✨🎉🎊🎉🎊✨💋💁🏾♀️ Hello Beauty Babes, HAPPY 2018!!!!! Before getting into it, I wanted to wish you all a freaking amazing year that is full of accomplishments and blessings.
#affordable#art#article#beautiful#beauty#beauty blog#beauty blogger#beauty favorites#beauty news#blog#blogger#content#cosmetics#current#cute#drugstore#drugstore makeup#favorites#fun#funny#holidays#inspiration#interesting#lifestyle#makeup#makeup artist#makeup blog#makeup blogger#makeup brushes#makeup collection
1 note
·
View note
Text
Good morning dolls and Happy 2020! I hope you had fun last night. I wasn’t feeling to good so we stayed in and watched movies. I’m still trying to perfect the cut crease so I decided to try my hand at it again today.
So lets get into it….

BASE: I primed today using Tarte Poreless Mattifying Primer ($32 at Ulta or on the Tarte website). I color corrected using Tarte CC Undereye Corrector ($25 at Ulta, Sephora, or the Tarte website) in the color Light-Medium. For foundation today I chose Makeup Forever Ultra HD Invisible Cover Foundation ($43 at Sephora or on the Makeup Forever website) in the color Y235. My concealer today is ColourPop No Filter Concealer ($6.50 on their website) in the color Medium 22. I set my full face using ColourPop No Filter Setting Powder ($9 on their website) in the color Translucent. I warmed up my face using Physicians Formula Butter Bronzer ($15.99 at Ulta) in the color Bronzer.

EYES: I primed my eyes with MAC Pro Longwear Paint Pot ($22 at Ulta or MAC) in the color Soft Ocher (I also used this product to cut the crease on my mobile lid). Today I used the ELF The New Classics Eyeshadow Palette ($14 on their website). I set the primer with Creme (a bright cream matte). For my first transition color I chose Truffle (a peach toned tan matte) and as my second transition I chose Darling (an orange toned tan matte). I chose Muse (a muted plum toned deep brown matte) for my crease color. After cutting my crease I chose Beloved (a peach toned light gold shimmer) and then I used Rose Gold (a copper toned gold shimmer) over top to deepen the middle 1/3 of the mobile lid. I then buffed all the hard edges of the transition and crease with the color Charmer (a muted dusty mauve matte). On my lower lash line I chose Darling again and then I darkened the lash line with Muse and to buff the lower lash line into a drop shadow I used Charmer. I highlighted the inner corners with Glamour (a pale champagne shimmer). I did my brows using Benefit Precisely My Brow Pencil ($24 on their website) and Gimme Brow Gel ($24 on their website) in the color 4.5. I carved out my brow line with the BH Studio Pro Brow Highlighter ($5 on their website) on the matte side and set it with the color Creme again. I lined my waterline with BH Cosmetics Power Pencil ($8 on their website) in the color Beige. I chose Benefit Roller Lash Mascara ($25 on their website) in black.

CHEEKS and LIPS: My blush today is Tarte Amazonian Clay 12-Hour Blush ($29 at Ulta or the Tarte website) in the color Seduce (a muted rose toned coral matte). I chose to highlight the top of my cheek bones, brow bones, and Cupid’s Bow with Essence Pure Nude Highlighter ($4.49 at Ulta) in the color Be My Highlight. I also highlighted the tip and bridge of my nose and the center between my brows. I used Charlotte Tilbury Airbrush Flawless Finish Skin Perfecting Micro-Powder ($45 on the Beautylish website) in the color 2 Medium as my finishing powder. On my lips I used NYX Suede Matte Lip Liner ($4 at Ulta) in the color Tea 7 Cookies (a muted mid-toned pink) and filled in my lips with BH Cosmetics collaboration with It’s My Raye Raye Liquid Lipstick ($9 on their website) in the color Rosey Raye (a soft rose coral nude matte).

Final Thoughts ….
Tarte Poreless Mattifying Primer: A- It’s billed as a 12-hour makeup primer that fights shine & minimizes the look of pores for a smooth, matte surface and you get 1 fluid ounce of product. This primer feels silicon primer that leaves the skin velvety smooth. I really like this primer but I hate the smell of this primer. It helps blur the pores so well that I don’t mind the smell because my skin looks flawless when I wear this primer. I have plans to repurchase this primer when I use it up.
Makeup Forever Ultra HD Invisible Cover Foundation: A++ This foundation comes in 59 shades with 15 shades for deeper skin tones. It’s billed as a foundation that provides undetectable medium coverage and a blurred, skin-like finish for up to 24 hours. You get 1.01 fluid ounces of product. I keep forgetting just how much I love this foundation!! I’m in the shade Y235 Ivory Beige and it’s a spot on color match for me. This foundation melts into the skin seamlessly. 2 pumps is all I need to cover my full face and neck. It doesn’t settle into the lines or pores and it lasts all day without any touch ups. This is definitely a foundation I will keep in stock.
ColourPop No Filter Concealer: A+++ You get .14 fluid ounces of product. There are 30 shades with 10 being for each light medium, and deep skin. Every time I use this concealer I fall more and more in love with it. A little goes a long way and it just melts into the skin. It’s not a thick concealer but it’s also not too thin. It doesn’t crease and doesn’t dry down matte. It’s a very nice concealer and I will most definitely be repurchasing it.
ColourPop No Filter Setting Powder: A- You get .30 ounces of product in a sifter pot. It comes in 3 shades (translucent, banana, and translucent deep). This powder is growing on me. When I first purchased this powder it didn’t work that well for me, it wore off within 2 hours….I figured out it was that I had used too much moisturizer underneath a tinted moisturizer. The second time I tried this powder it worked better but was a tiny bit cakey…. This time it set my foundation flawlessly. It’s not such a great powder for setting the under eye because it does make the under eye look dry but it also sets the concealer perfectly so I just use a satin setting powder over top for under the eye. I really am starting to like this powder …. I will be repurchasing it once I run out.
MAC Pro Longwear Paint Pot: A+++ You get .17 ounces of product in this pot. It’s available in 6 colors and is billed as a long-wearing blendable cream shadow that can be worn alone or with other products. I have had this pot for a while and forgot all about it, but while watching some Youtube videos I was reminded of this product and decided to break it out and try it again. I forgot how much I like it a a shadow base. I also used it today to cut my crease and it worked so much better than my Shape Tape did to cut the crease. It cancels out all veins and discoloration on the eye lids without being tacky like when i use my Shape Tape…. a little goes a long way so I will not need to purchase this for a while, but I am definitely putting this paint pot back into rotation.
ELF The New Classics Eyeshadow Palette: A+ This palette is billed as having a luxe formula of neutral eyeshadows that�� is smooth, creamy, blendable, and ultra-pigmented for effortless application. I really love this palette. Every time I use this palette I forget just how pigmented this palette really is. I never have to go back into the shadows more than 1 time to get great color payout. This palette has everything you need for a natural look or a smokey look. It’s my favorite ELF buy of 2019. I am glad I purchased it.
Benefit Roller Lash Mascara: A+ I You get .3 fluid ounces of product. I have not been able to put this mascara down since the day I opened it. It really is a great mascara, it’s not going to replace my Loreal Voluminous Carbon Black but I am definitely using this mascara a ton. I’ve already ordered a back up.
Tarte Amazonian Clay 12-Hour Blush: A+++!!! I say it all the time, this is my favorite formula of blush. You get .20 ounces of product. It comes in 13 shades. There is just no way to over do your blush with this formula. The formula is firm enough that with a few taps you get enough product for your cheeks. It blends well, is never patchy, and the color lasts all day. I need more colors truly I do.
Charlotte Tilbury Airbrush Flawless Finish Skin Perfecting Micro-Powder: A++ You get .28 ounces of product. When I first purchased this powder I didn’t find anything special about it…. I’ve tried it several ways and have finally figured out the best way to wear it is as a finishing powder. After all my makeup is done I finish the look with a light dusting of this powder and my face looks perfected, flawless, and on point. Oh yea… I drank the Kool-Aid on this one and I am not even sorry about it…. I will always have this in my collection.
BH Cosmetics collaboration with It’s My Raye Raye Liquid Lipstick: B++ You gey .12 fluid ounces of product. The formula of these liquid lipsticks is nice, but they don’t dry down all the way, it remains slightly tacky… there is no transfer or smudging …. but it does remain tacky… that typically isn’t my favorite formula but the Rosey Raye color is so stinkin’ pretty that I don’t even mind …. It is long lasting and wears down evenly. It’s a shame this color is a limited edition collaboration I would love to keep it in my collection permanently.

Well that’s all for now dolls… stay tuned I am going to blog my favorite makeup products of 2019 in a bit… for now I hope the first day of the year finds you with plenty of spoons and low on the pain scale…. until later …. remember save a spoon for a bit of lipstick.
XOXO
Gold Cut Crease Face of the Day Good morning dolls and Happy 2020! I hope you had fun last night. I wasn't feeling to good so we stayed in and watched movies.
0 notes